Personal wallet recovery
Table of contents
- Overview
- Step 1: Download the Nunchuk app and log in using Guest mode
- Step 2: Make sure that you are on mainnet
- Step 3: Recover your key(s)
- Step 4: Recover your wallet
- Step 5: Spend from the wallet
- Step 6: Clean up
Overview
A personal wallet is one where you possess all keys inside the wallet.
To recover a personal wallet, you will need:
- The seed phrase(s) for your key(s)
- The wallet configuration file
The number of seed phrases you will need is equal to the number of signatures required to spend from the wallet. For examples: for a singlesig wallet, you will need exactly 1 seed phrase; for a 2-of-3 multisig wallet, you will need 2 seed phrases.
Seed phrases are backups for your keys. They are defined in BIP-0039.
The wallet configuration file contains important information on how your wallet is constructed. It is defined in BIP-0129.
For simplicity, this is a “clean slate” recovery. It assumes that the user has nothing other than the seed phrases and the wallet configuration file. It uses Guest mode, which does not require an account. It also assumes that there are no hardware keys that survive from the original setup. If there are hardware keys, simply pair the hardware keys with Nunchuk in step 3 (instead of recovering).
Any key that has a passphrase must be recovered using both the seed phrase and the passphrase.
This recovery guide uses the Nunchuk desktop app. The same process can be done using the Nunchuk mobile apps.
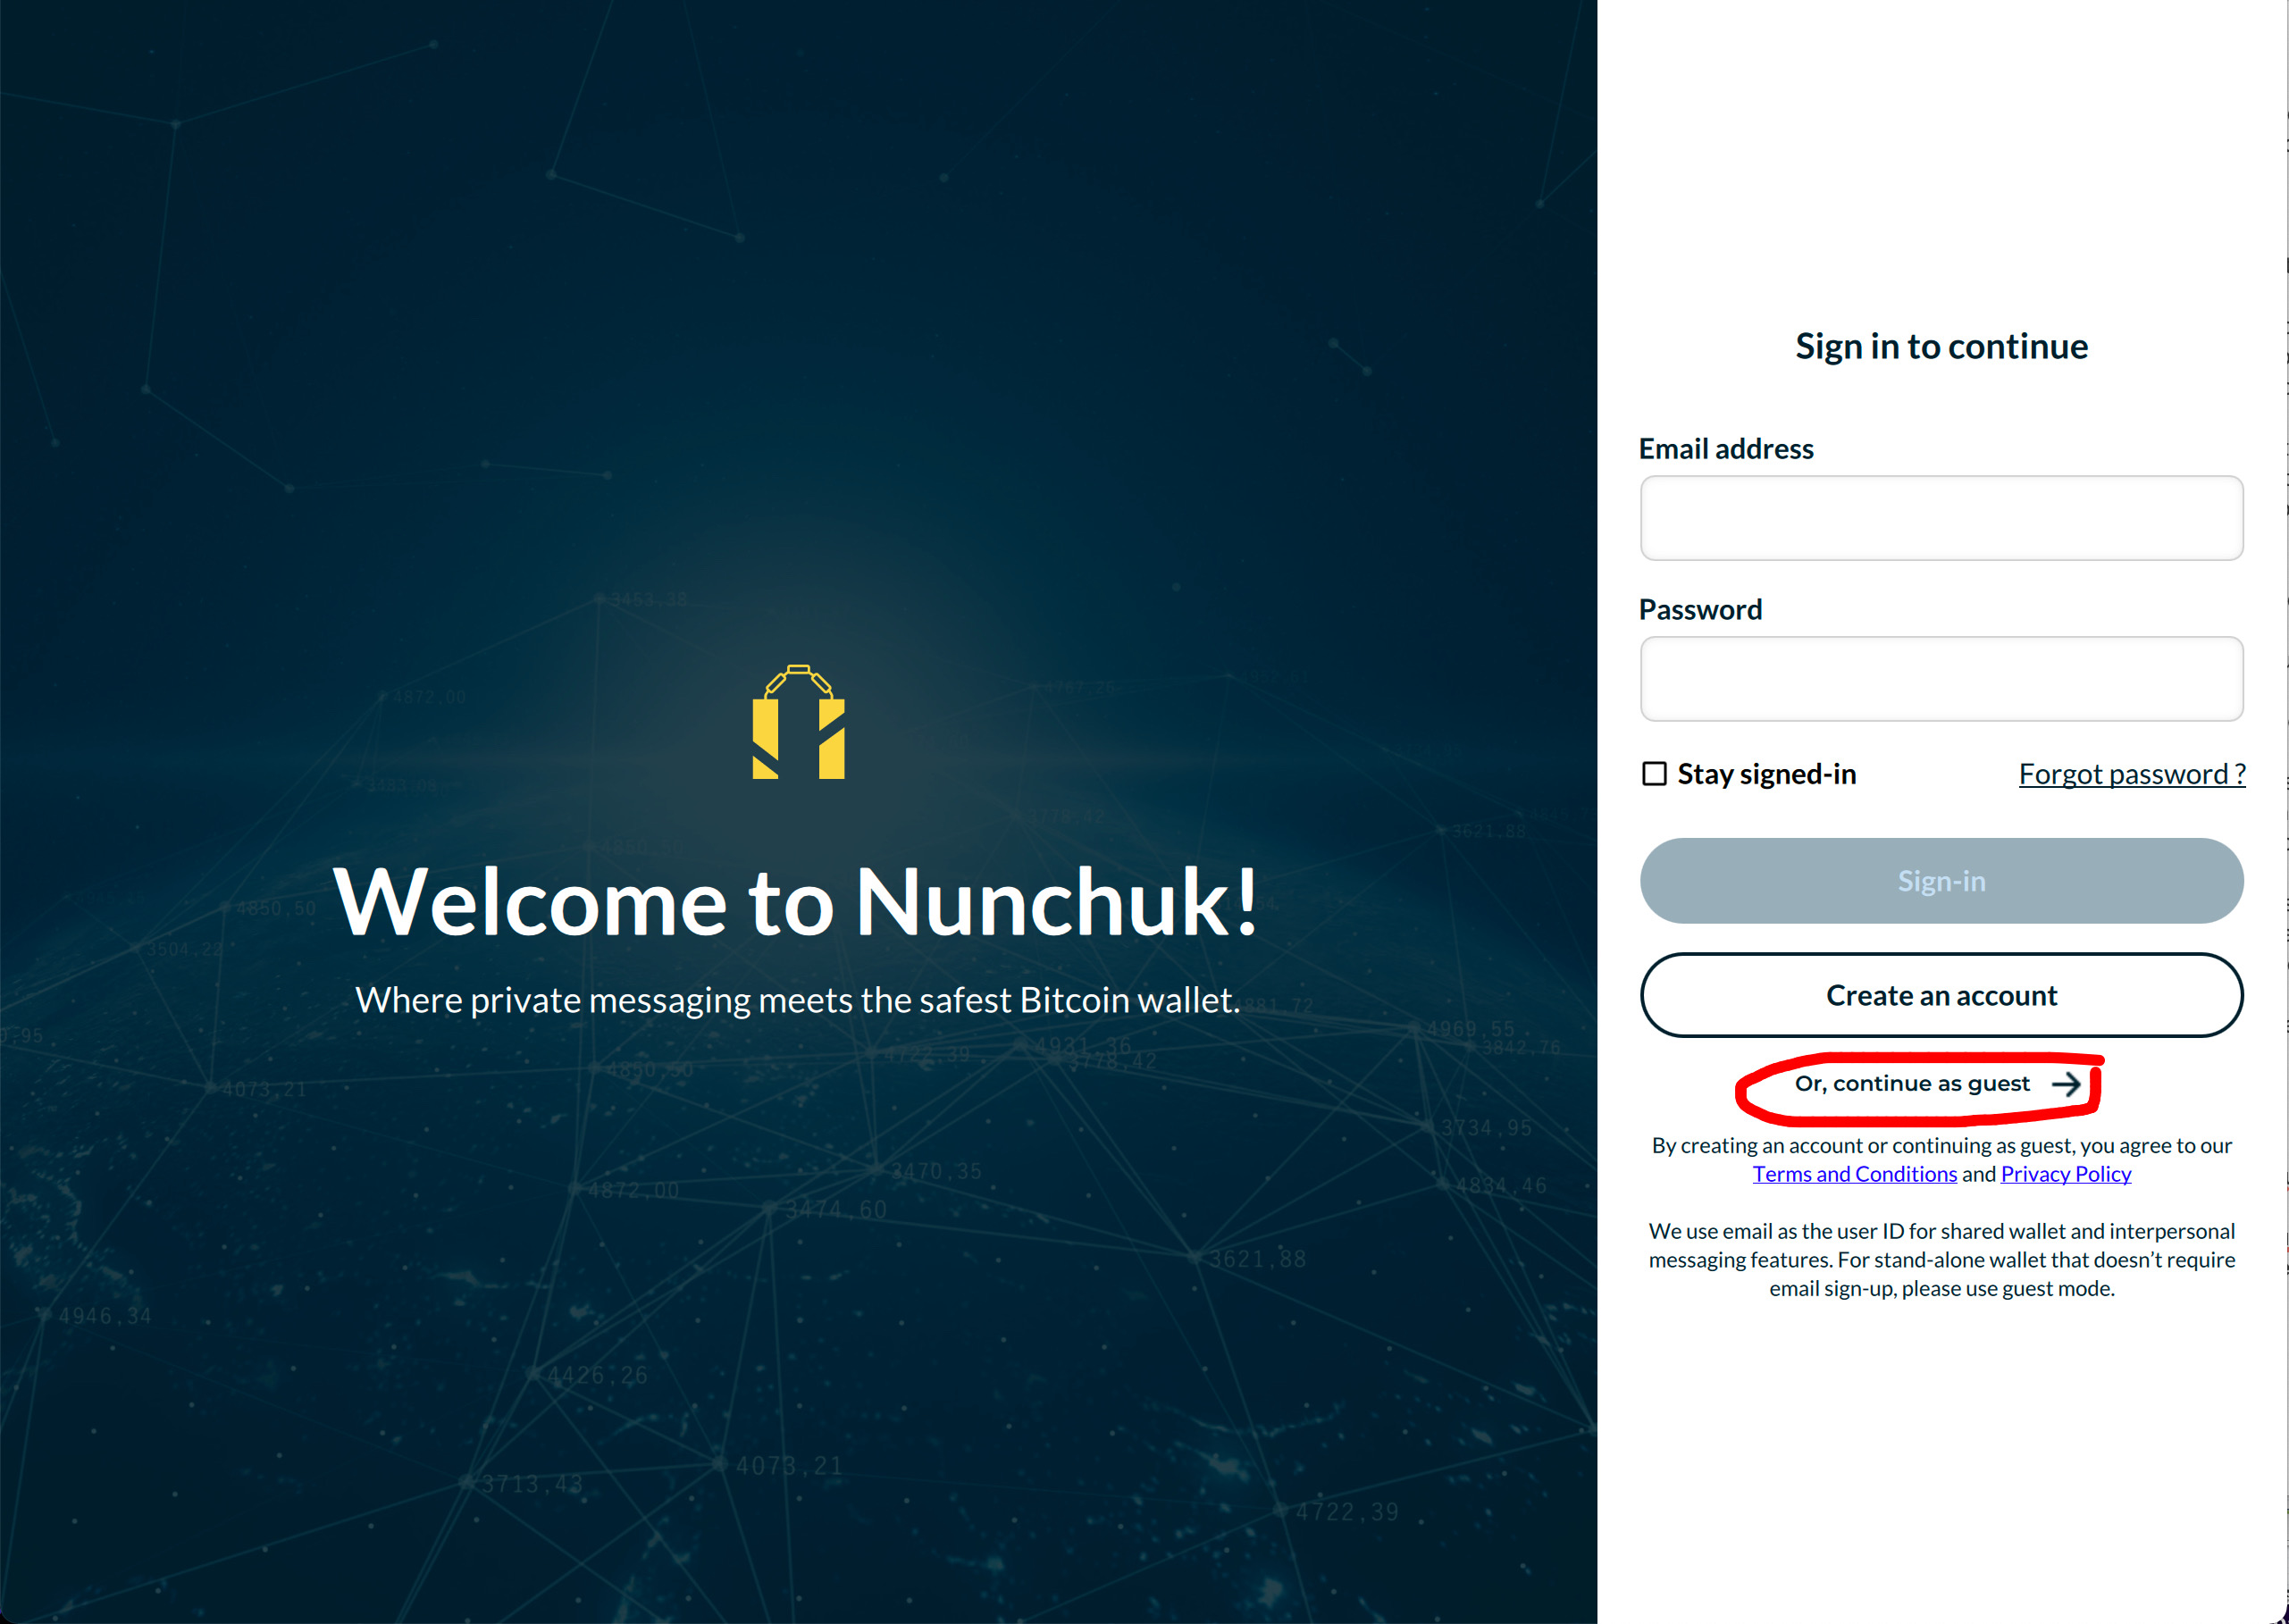
Step 1: Download the Nunchuk app and log in using Guest mode
Download the app from our website: https://nunchuk.io/#Download.
Log in as Guest.
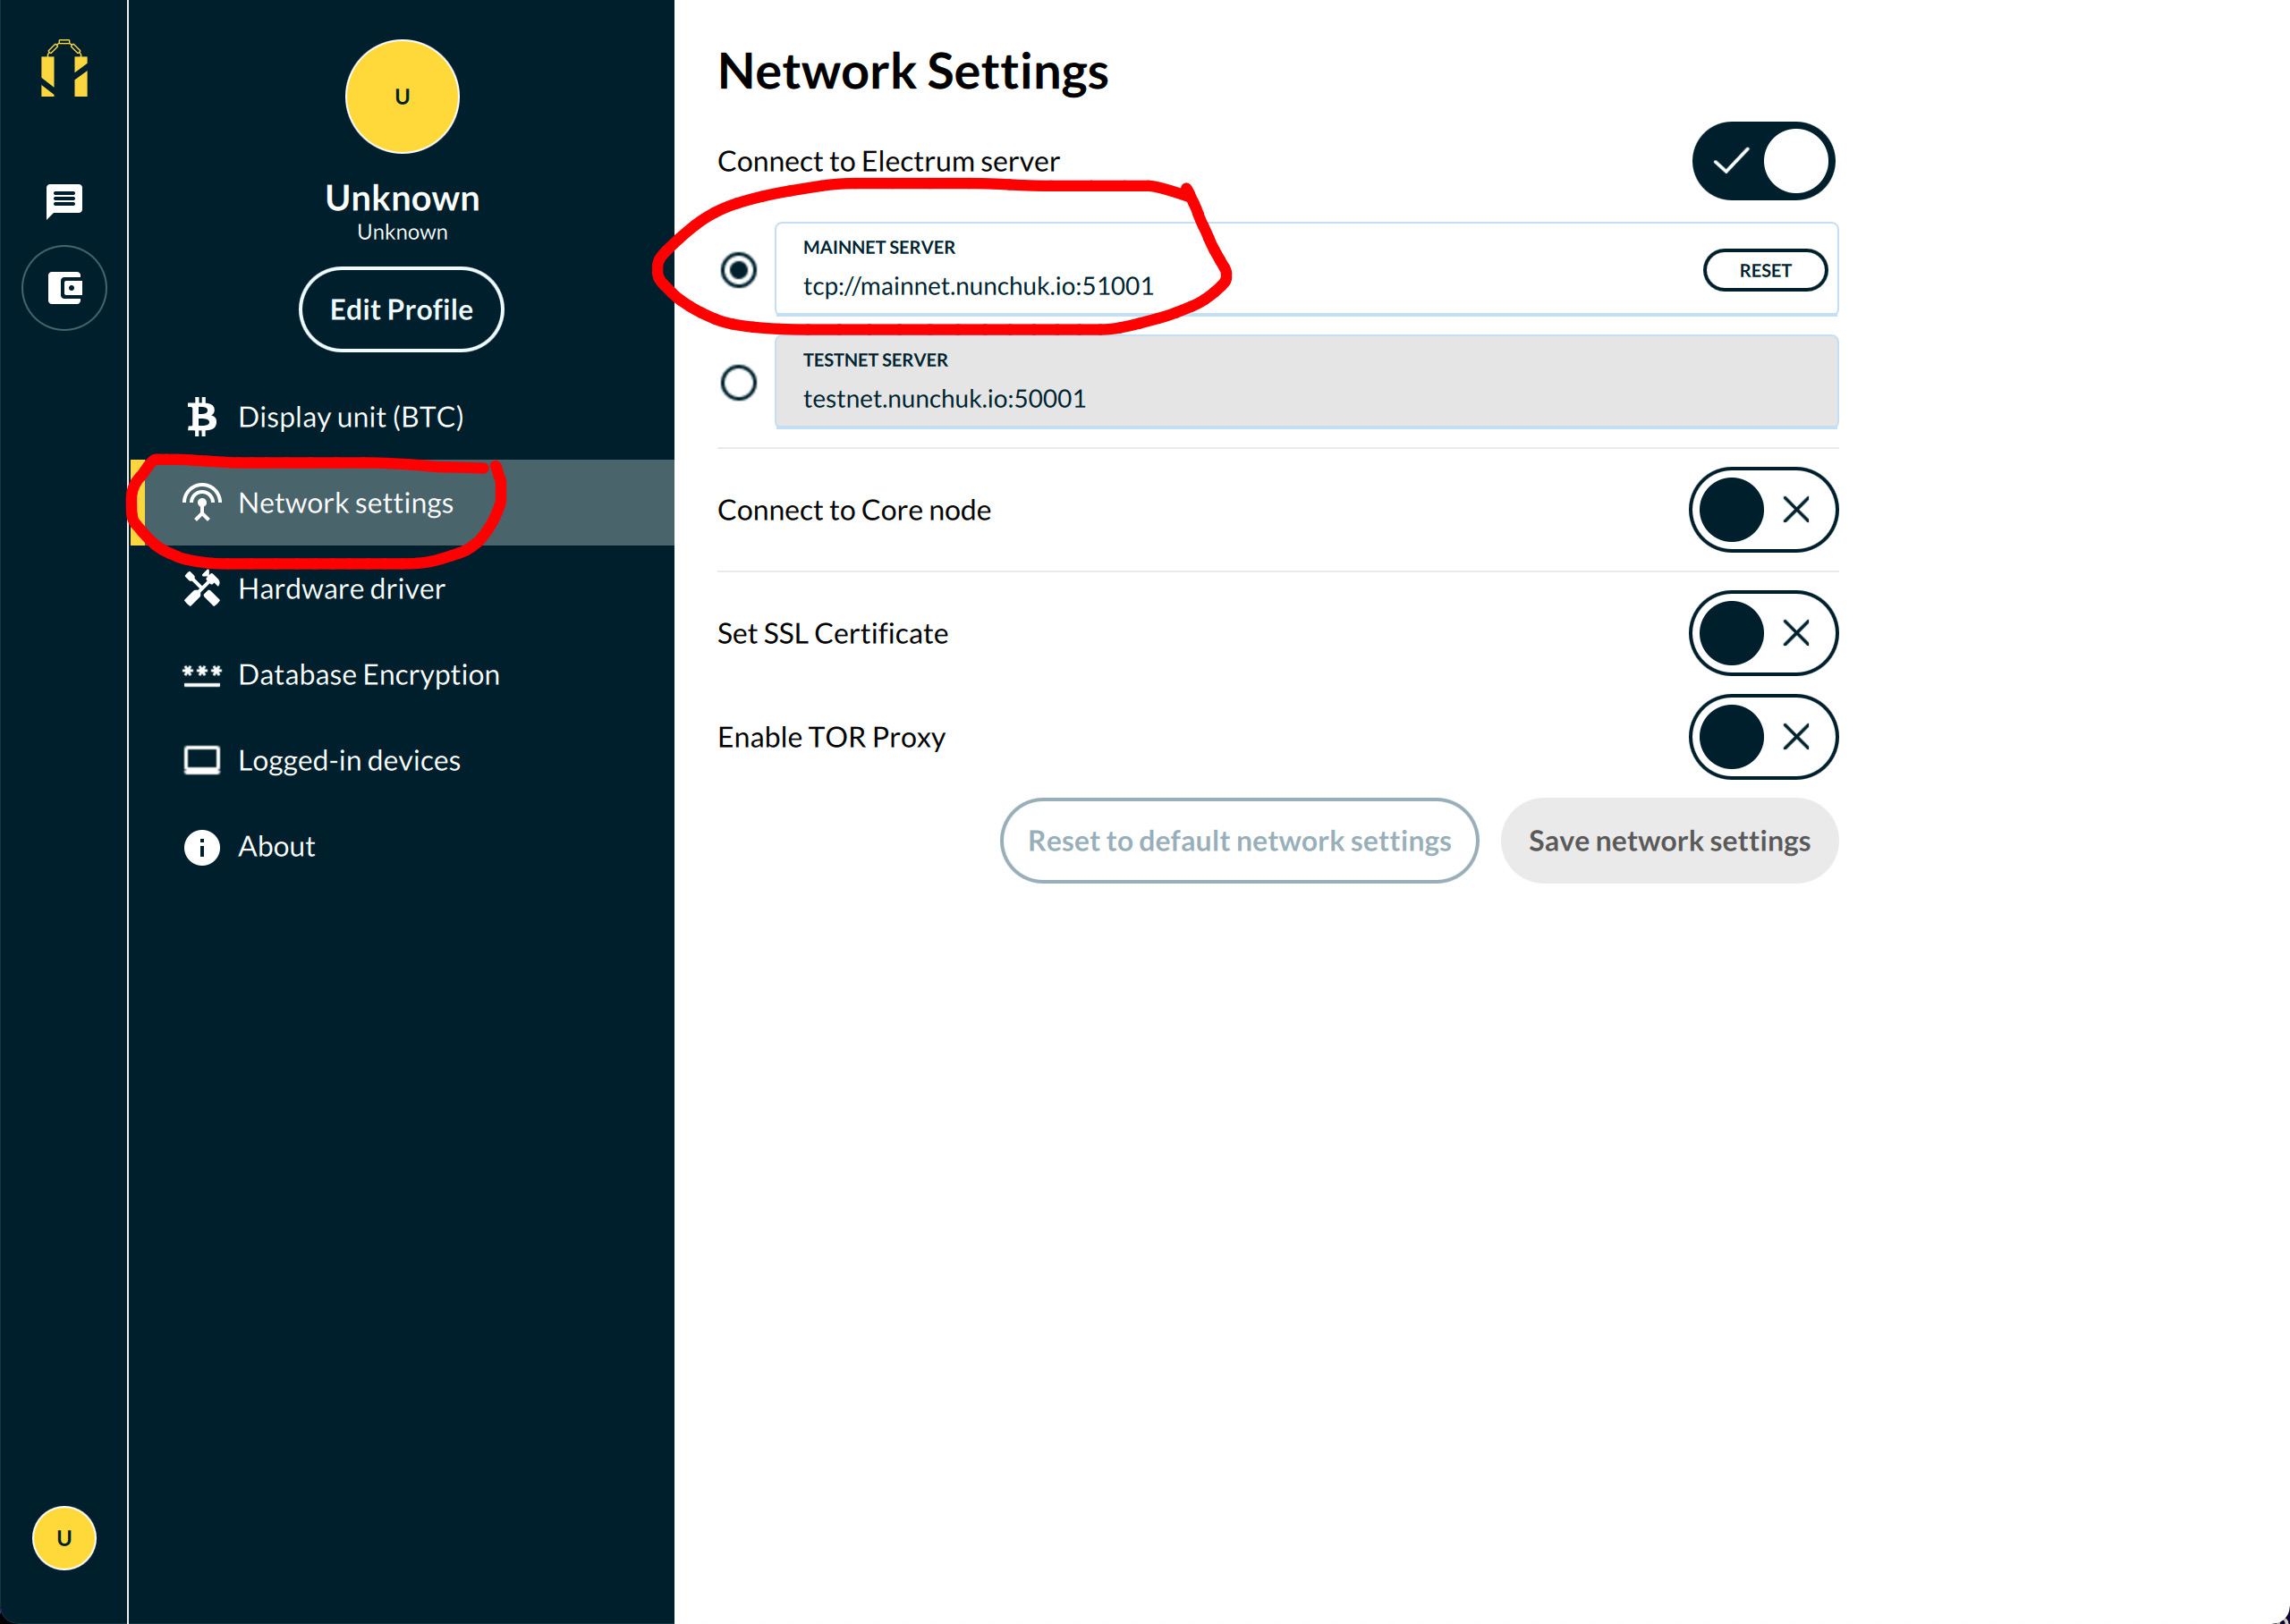
Step 2: Make sure that you are on mainnet
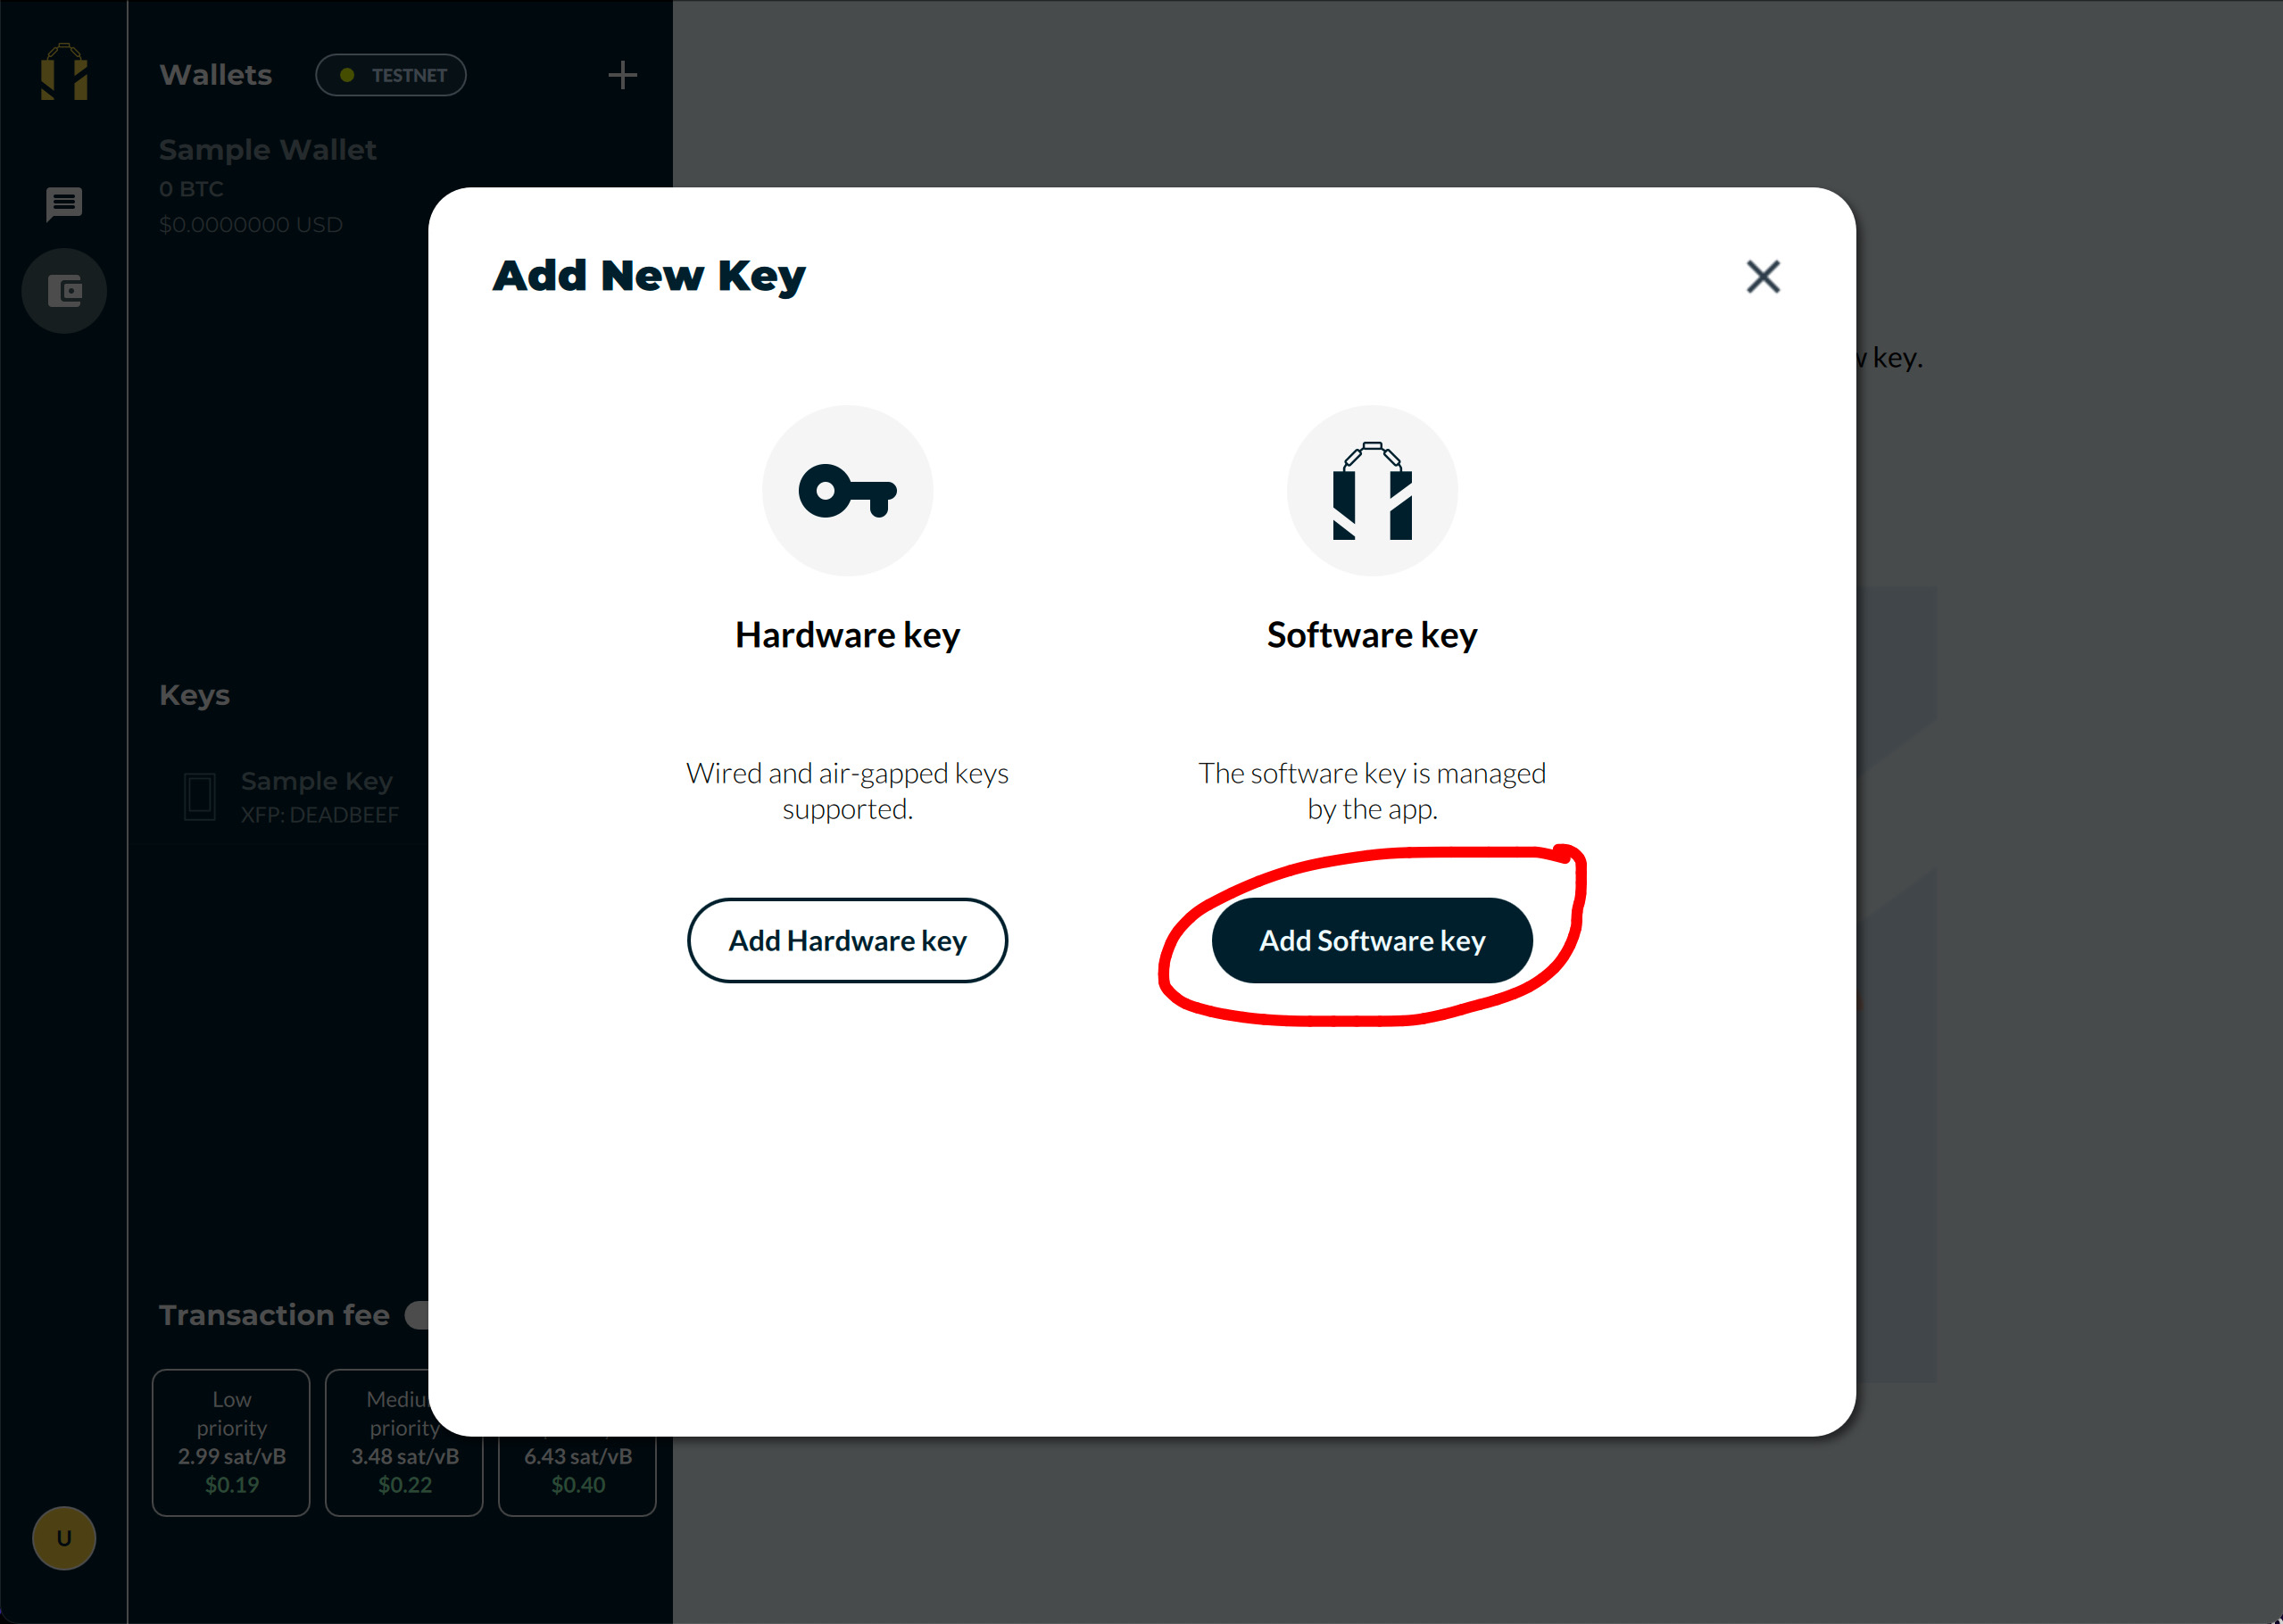
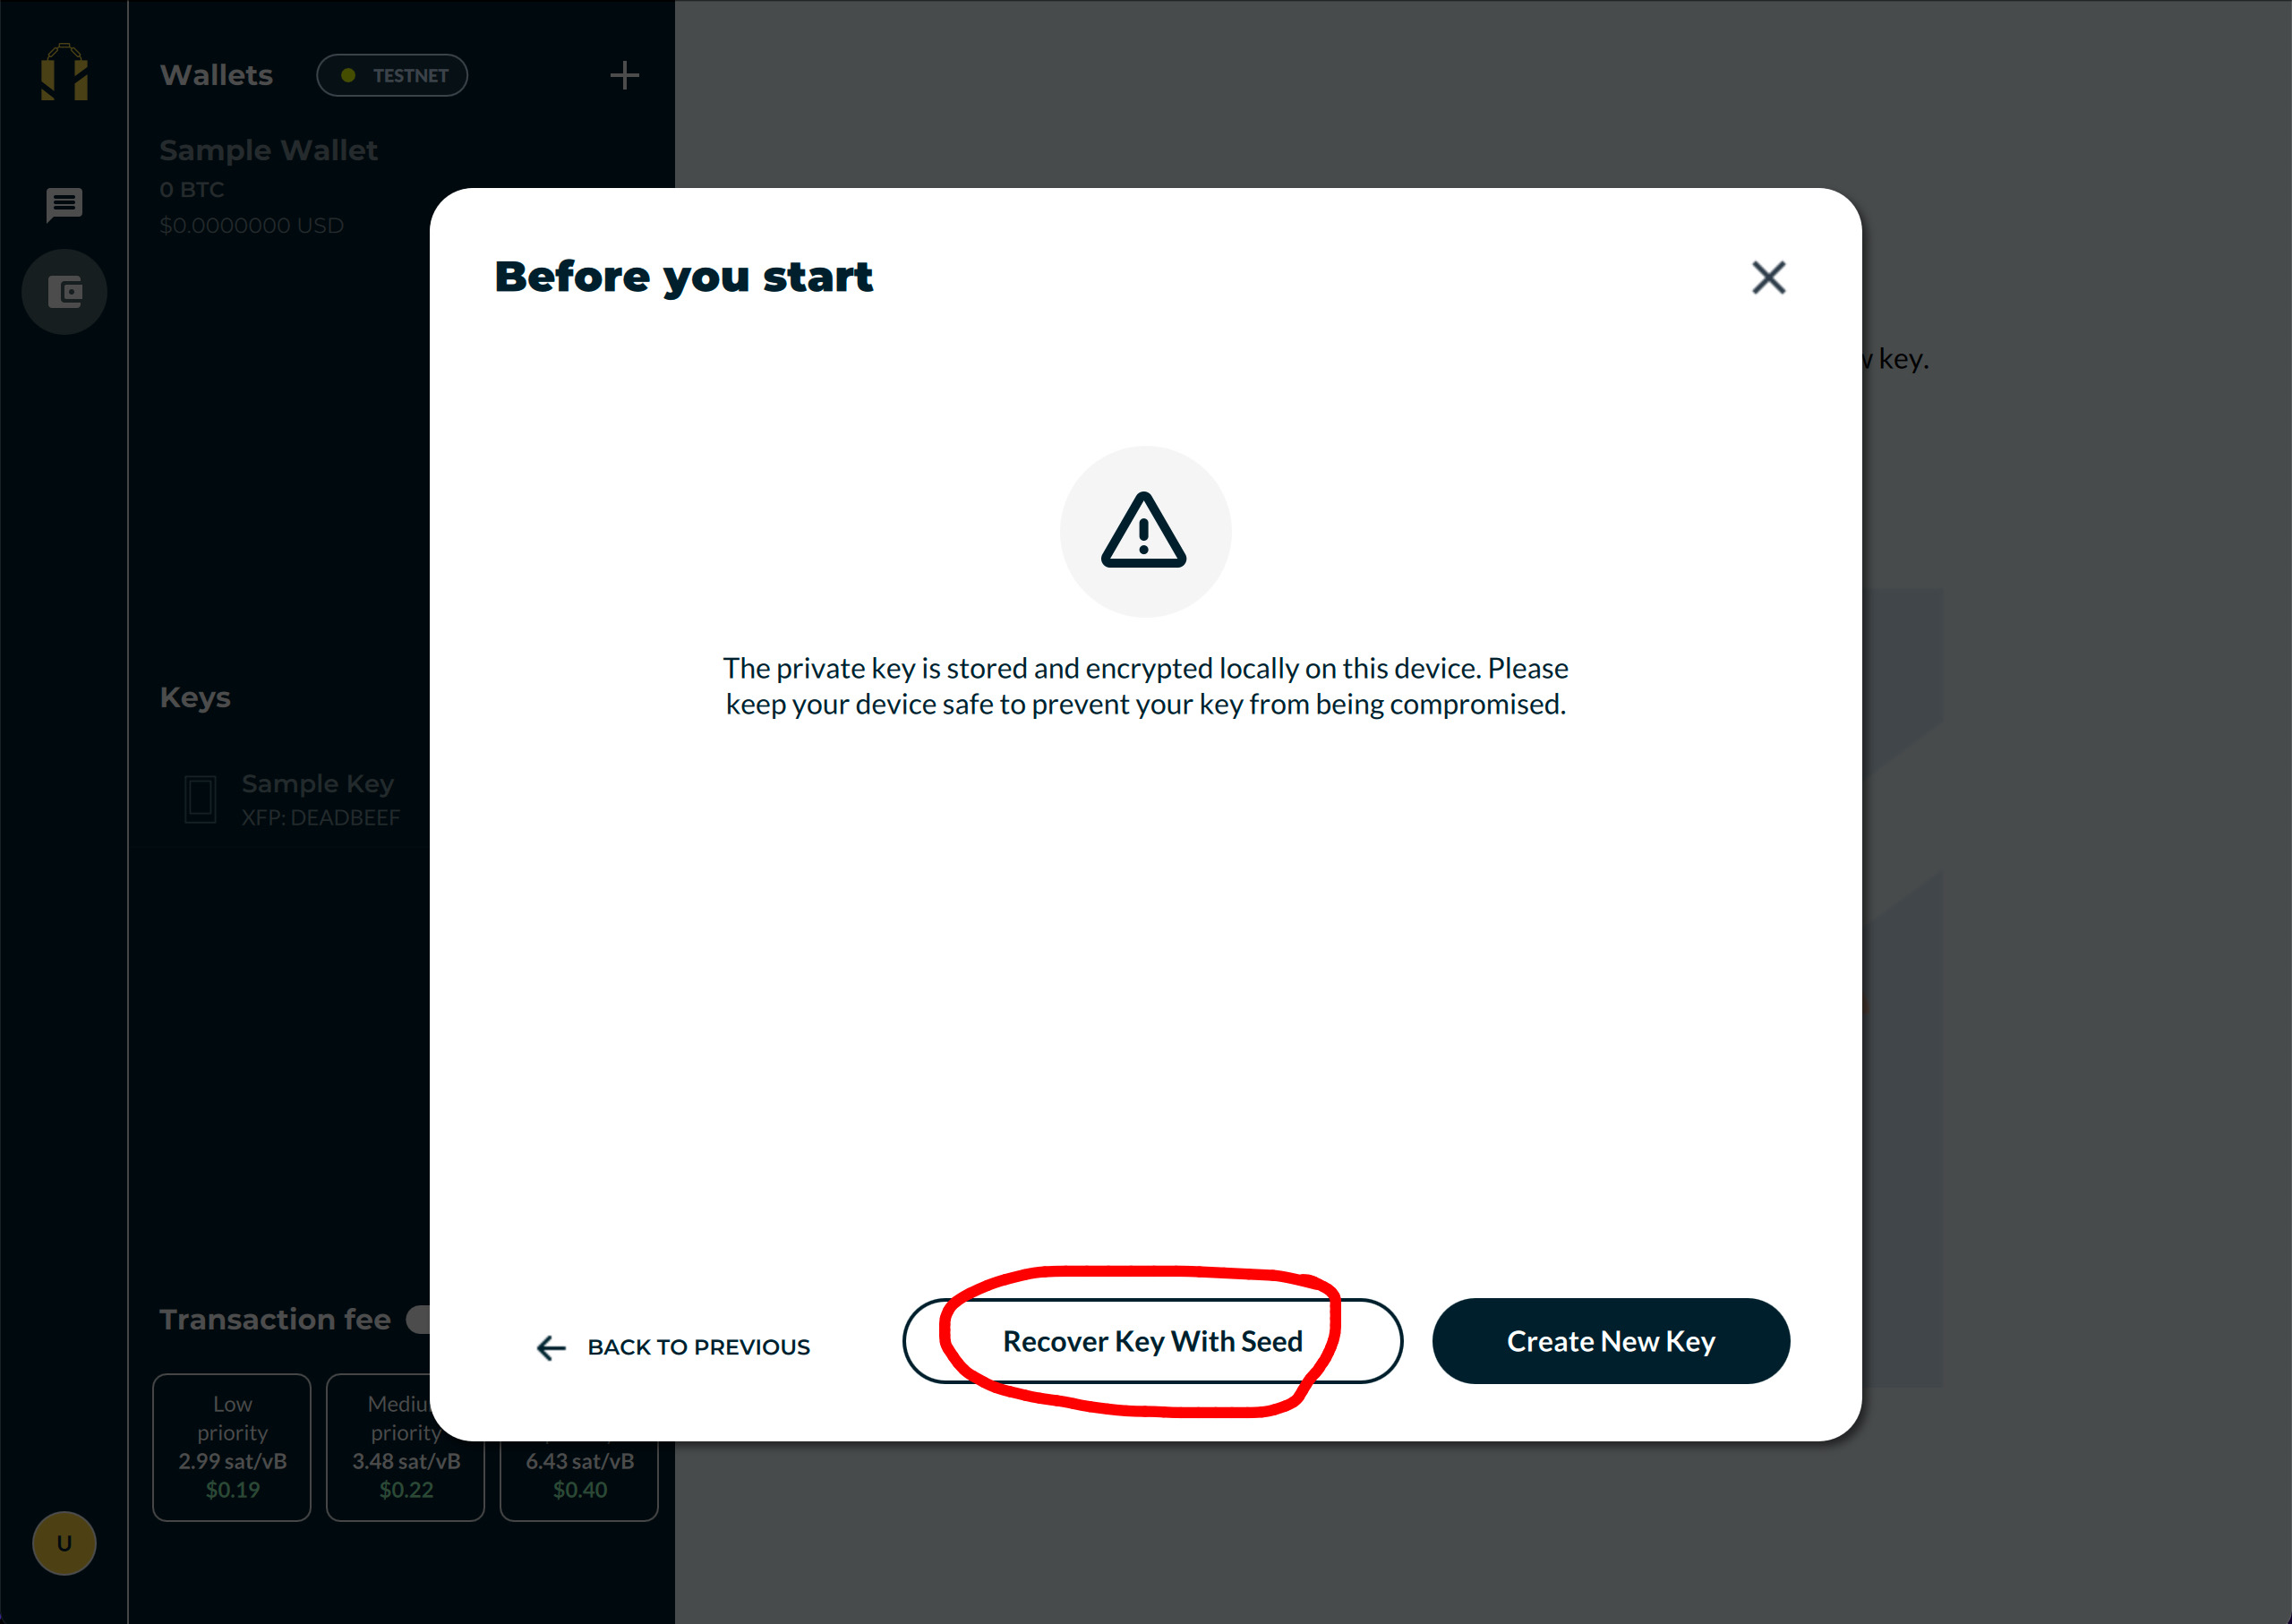
Step 3: Recover your key(s)
Recover your keys one-by-one by entering the seed phrase for each key. If you have a singlesig wallet, you will only need to recover one key.

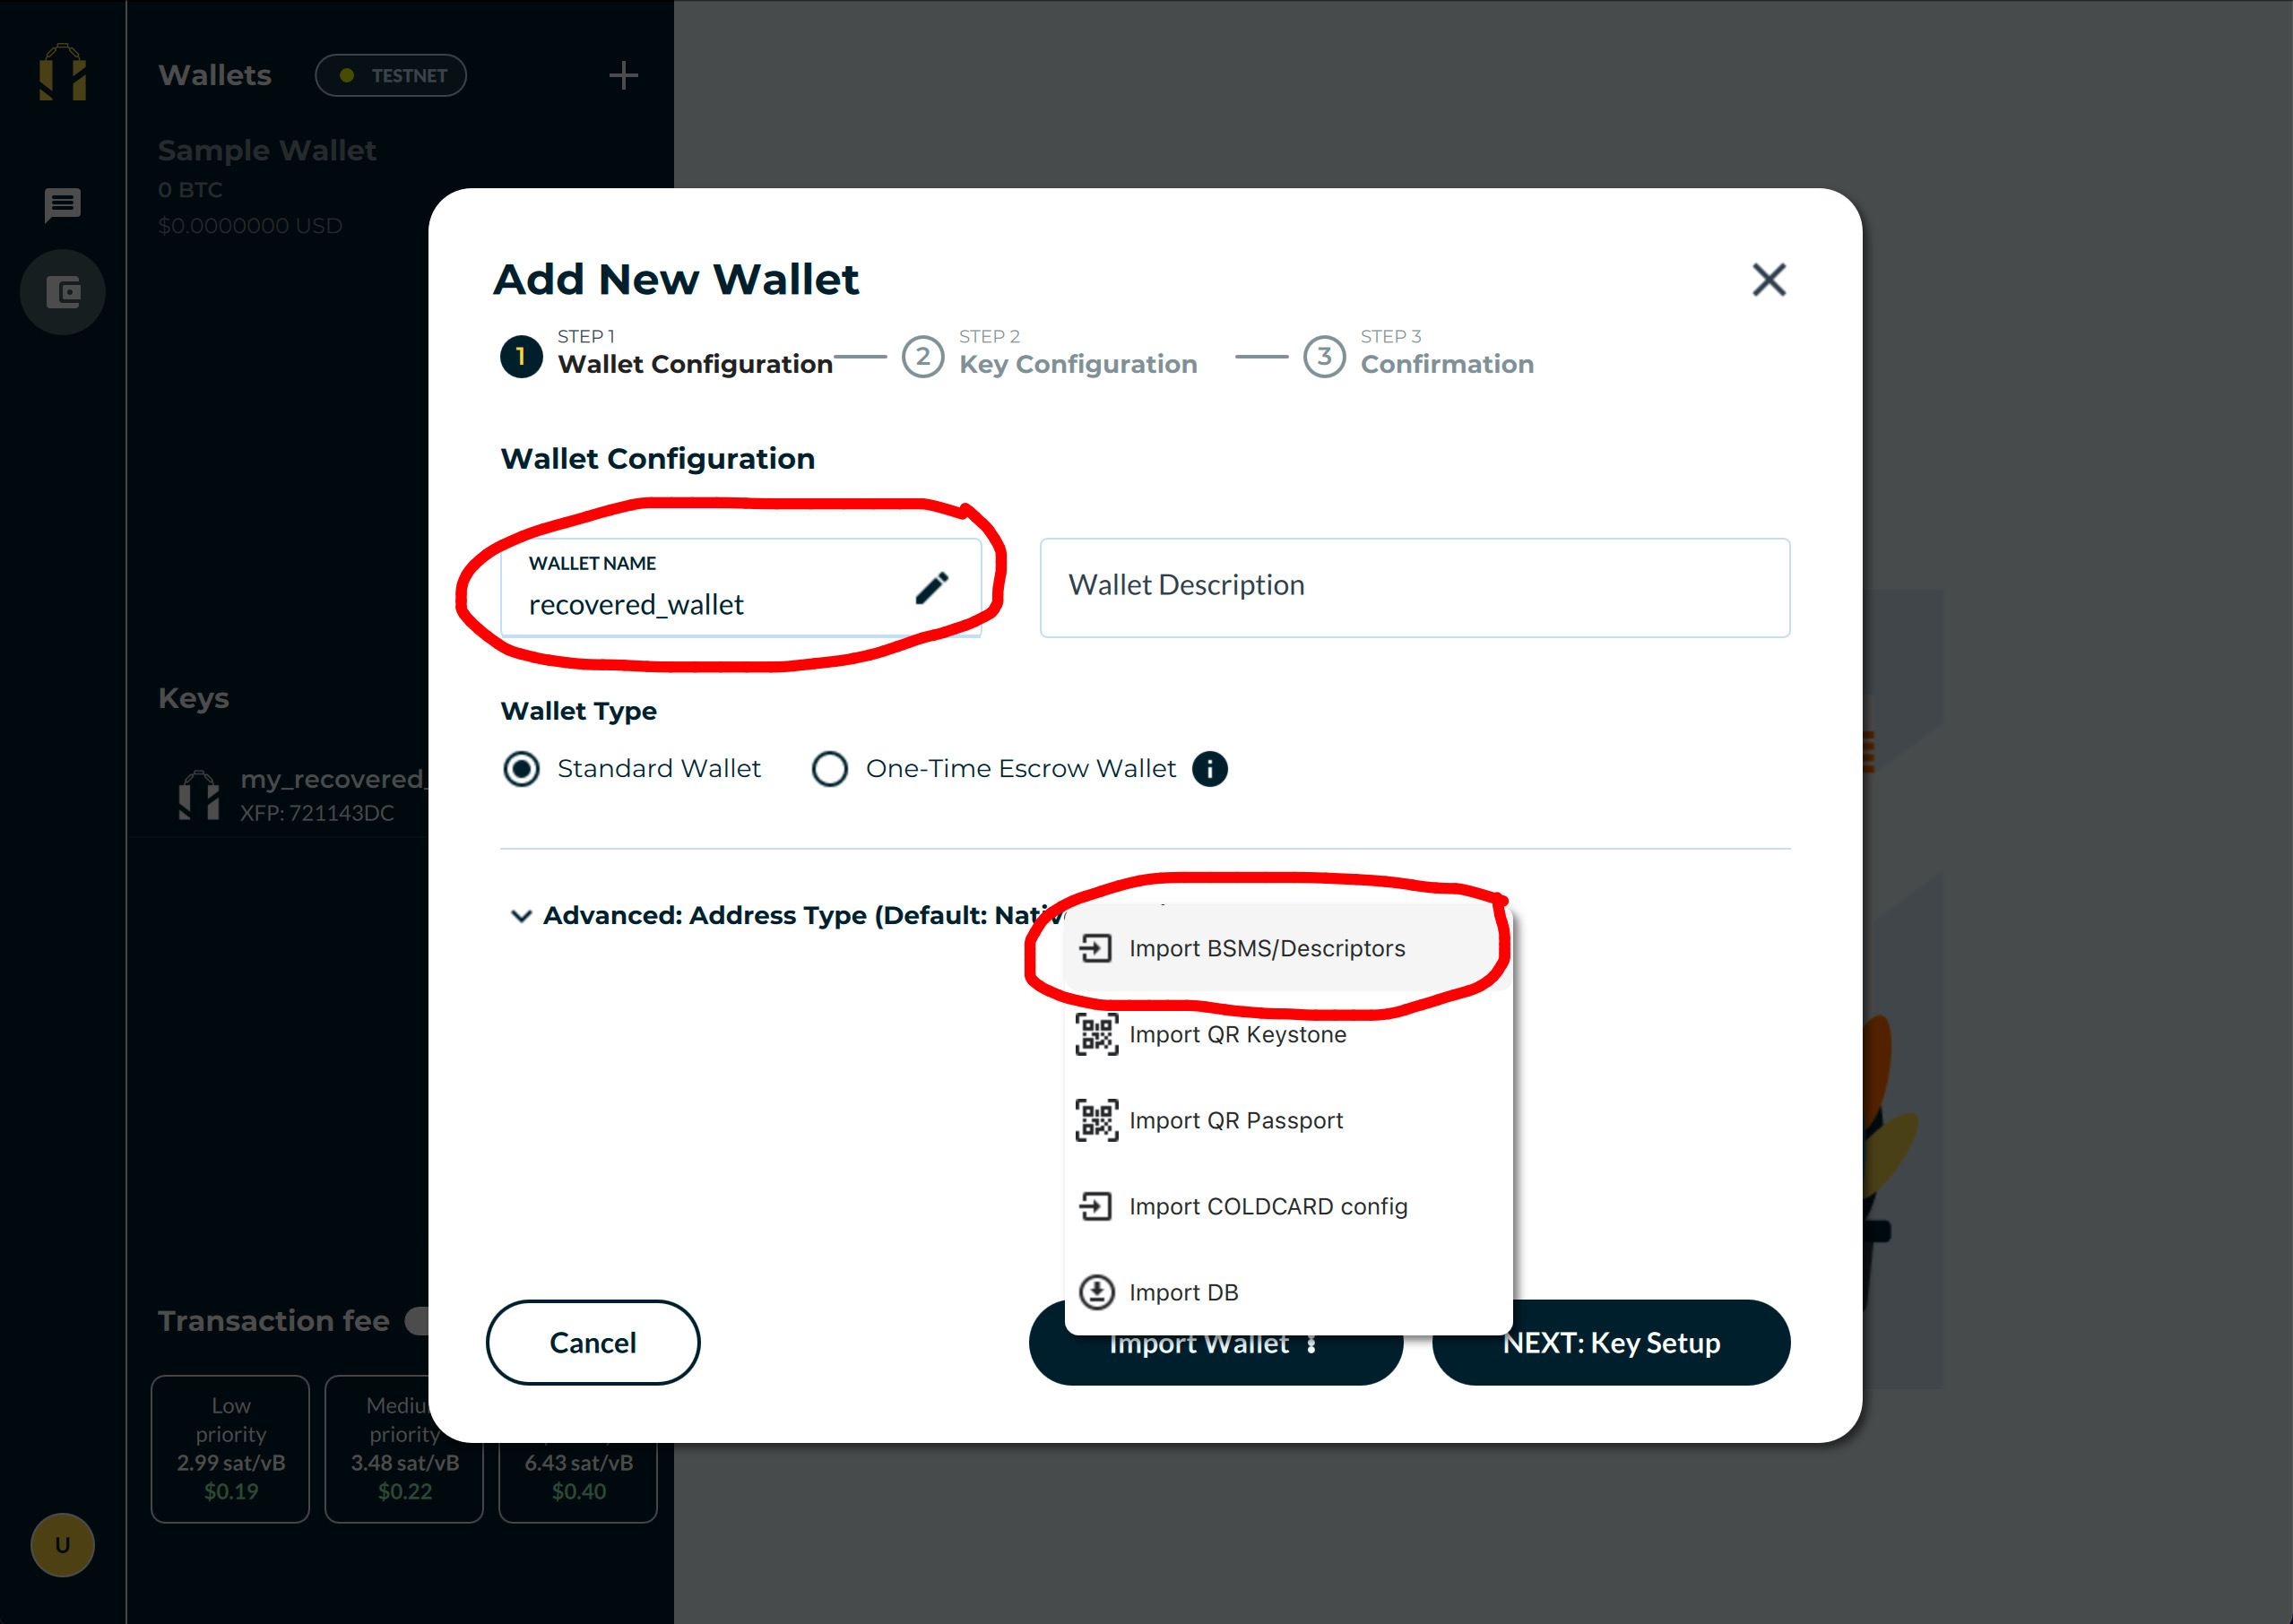
Step 4: Recover your wallet
Recover your wallet by importing the wallet configuration file (.bsms). Remember to name the wallet before selecting a file to import.
After the import, you should see the wallet show up in the list of wallets. Select the wallet and wait for it to finish syncing.
If the wallet’s transaction history and balance are still not up-to-date after a while, try restarting the app.

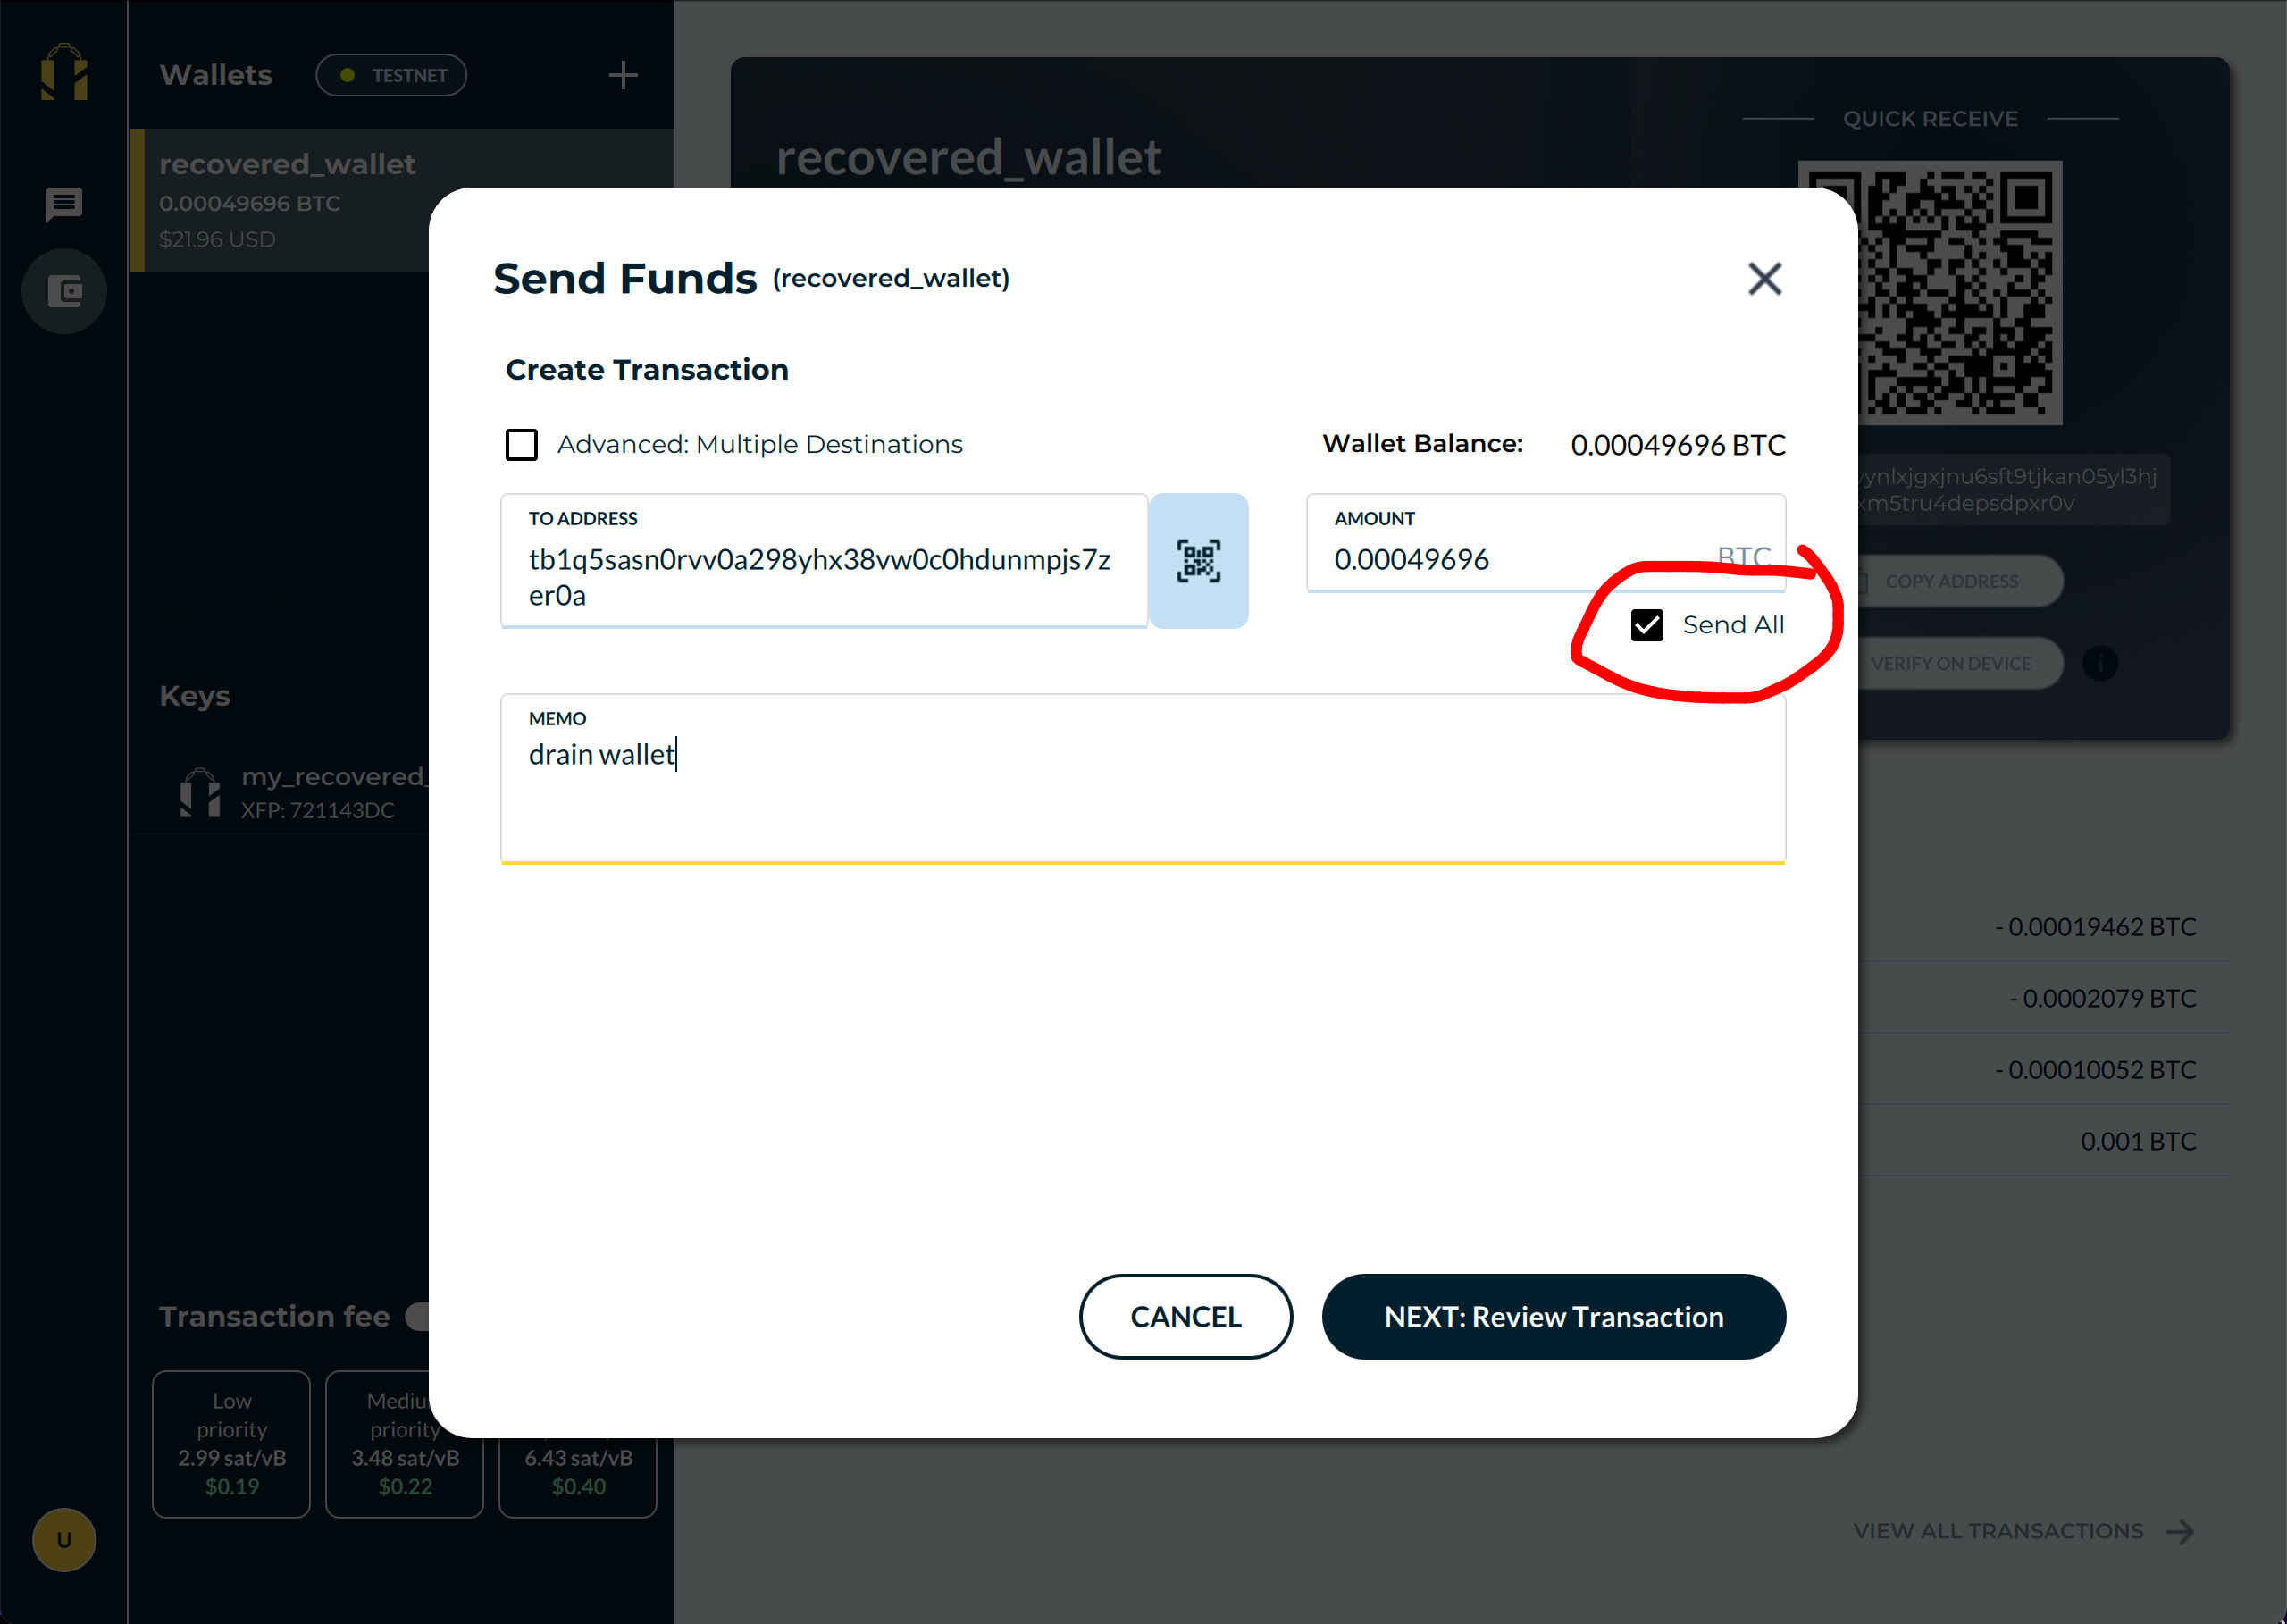
Step 5: Spend from the wallet
Hurrah, you have fully recovered the wallet! You can now proceed to withdraw your bitcoin.
Create a Send transaction, sign it with your recovered key(s), and wait for the transaction to confirm on the blockchain.
When signing, please make sure that all transaction data, such as destination address and transaction fee, are accurate. If you are unsure, try sending a small amount first.
To drain the entire wallet, tick the “Send all” box when creating the Send transaction.
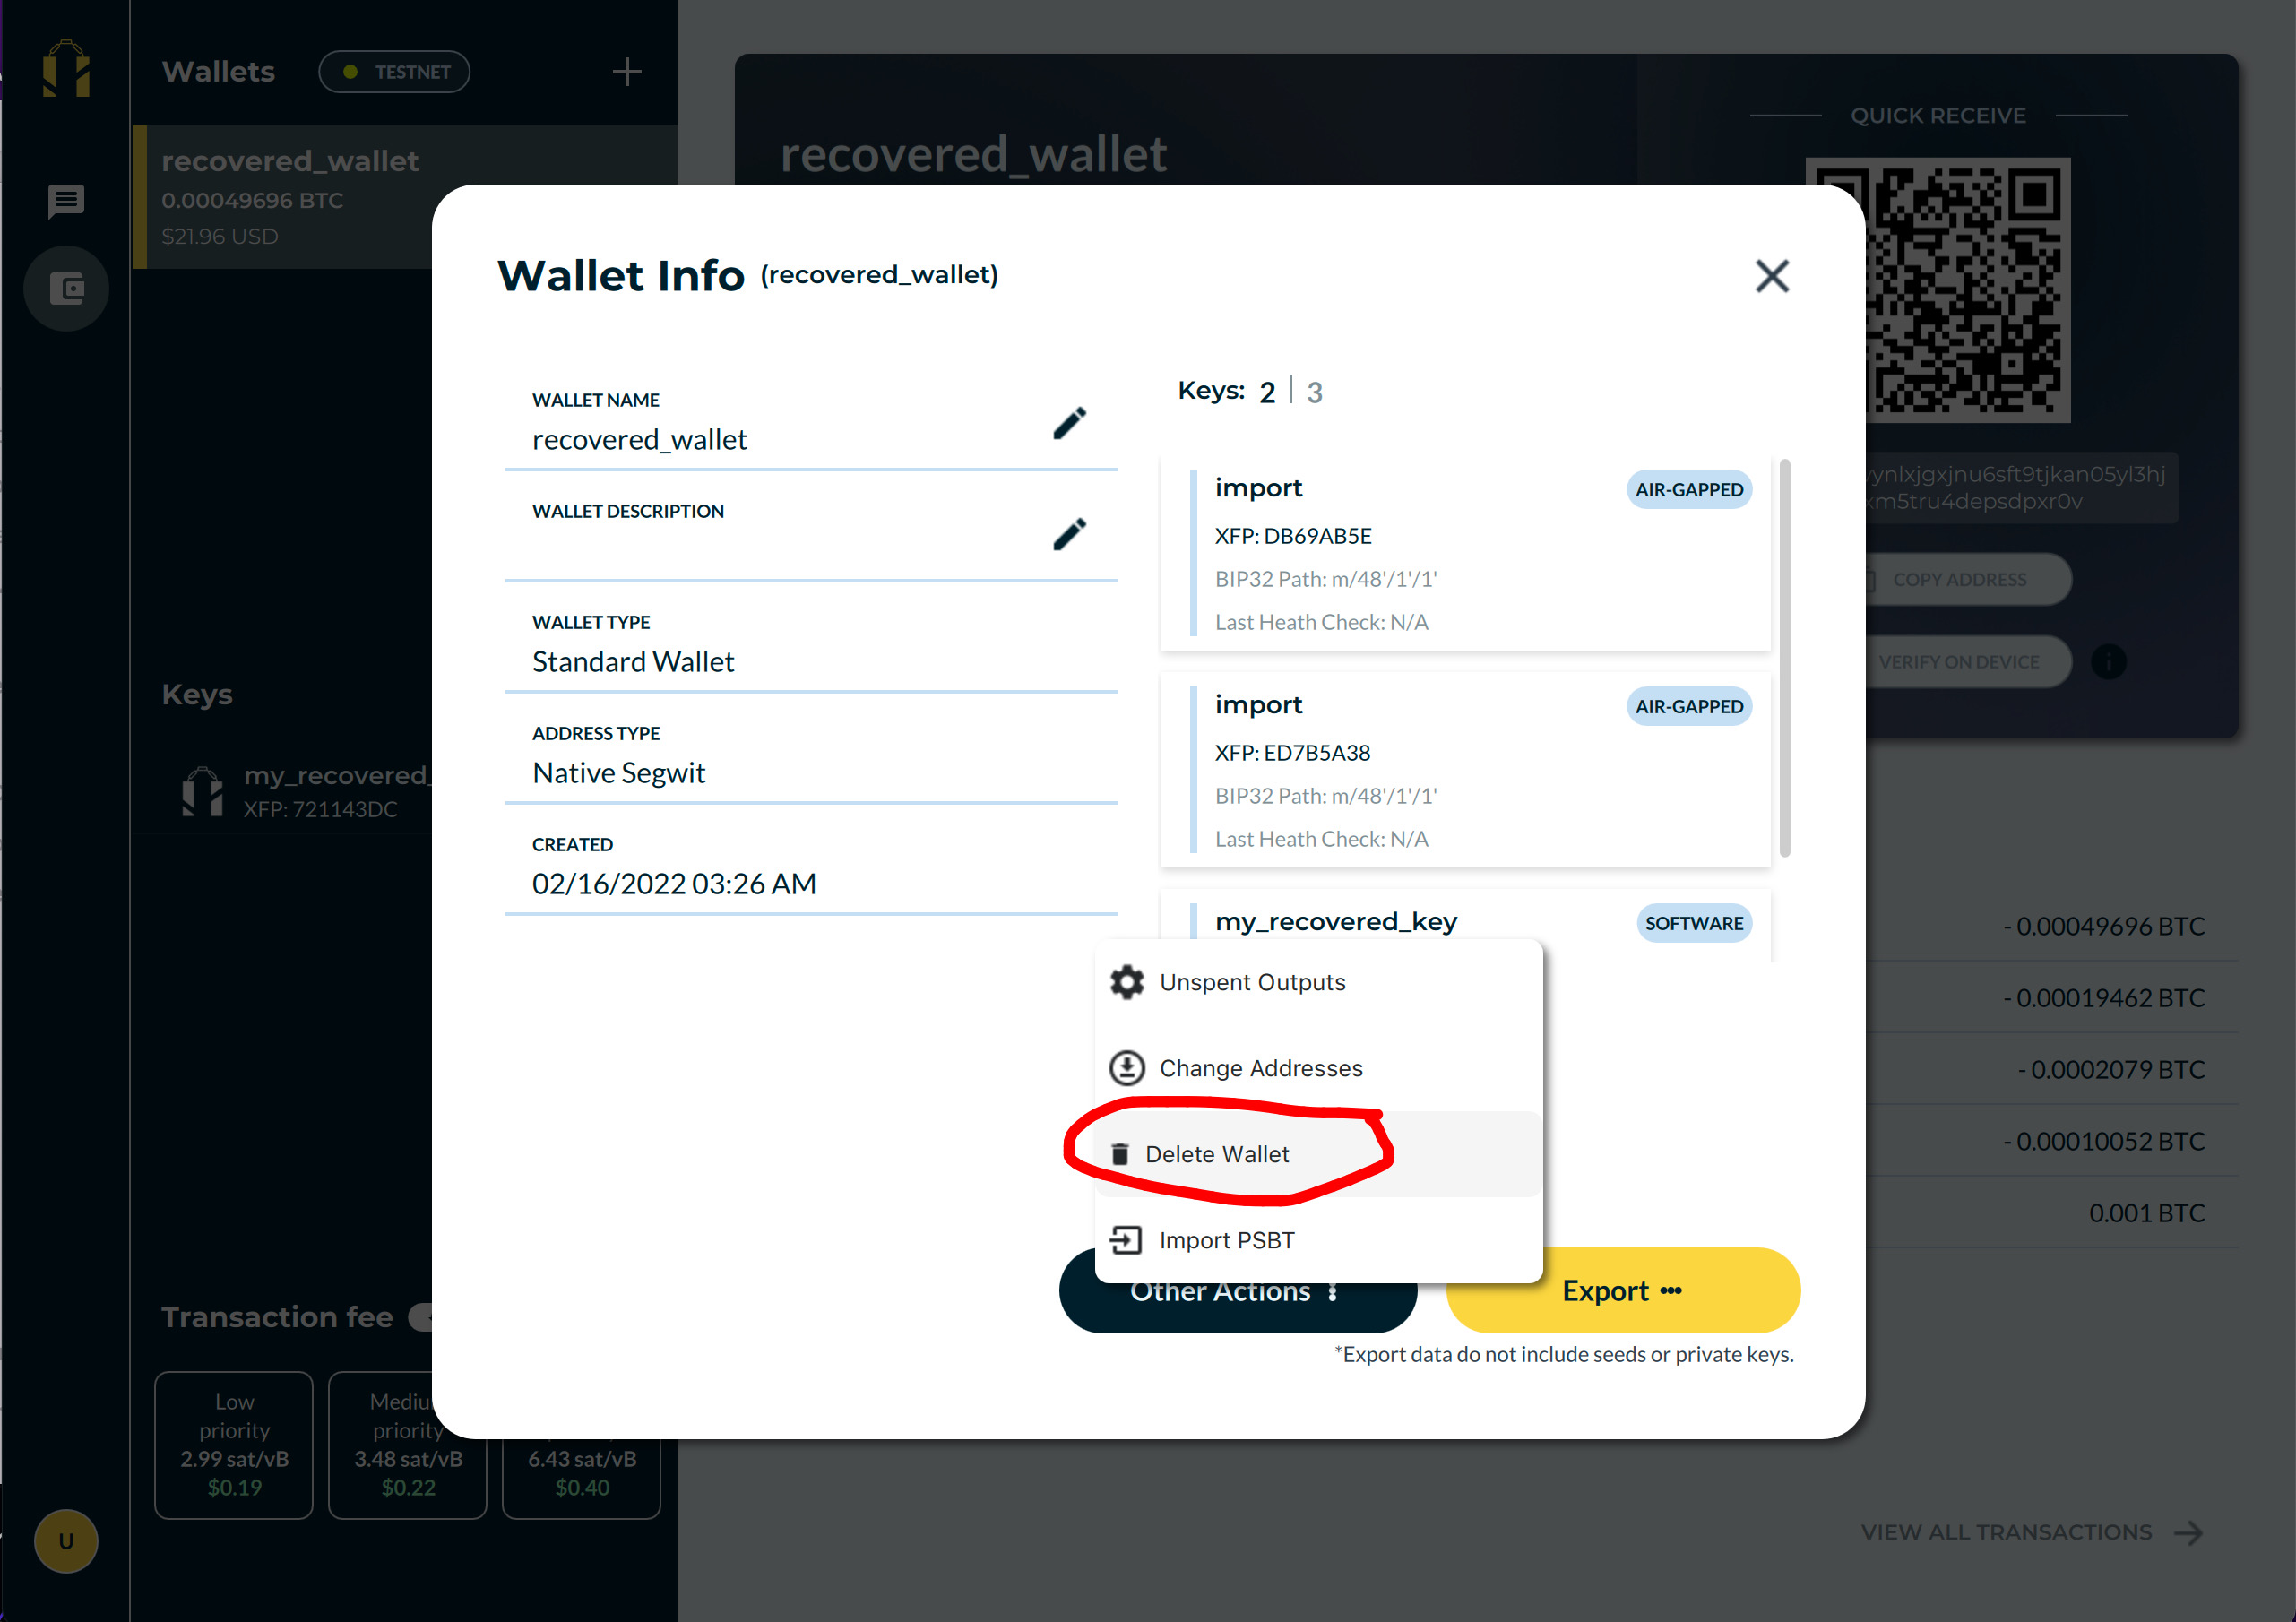
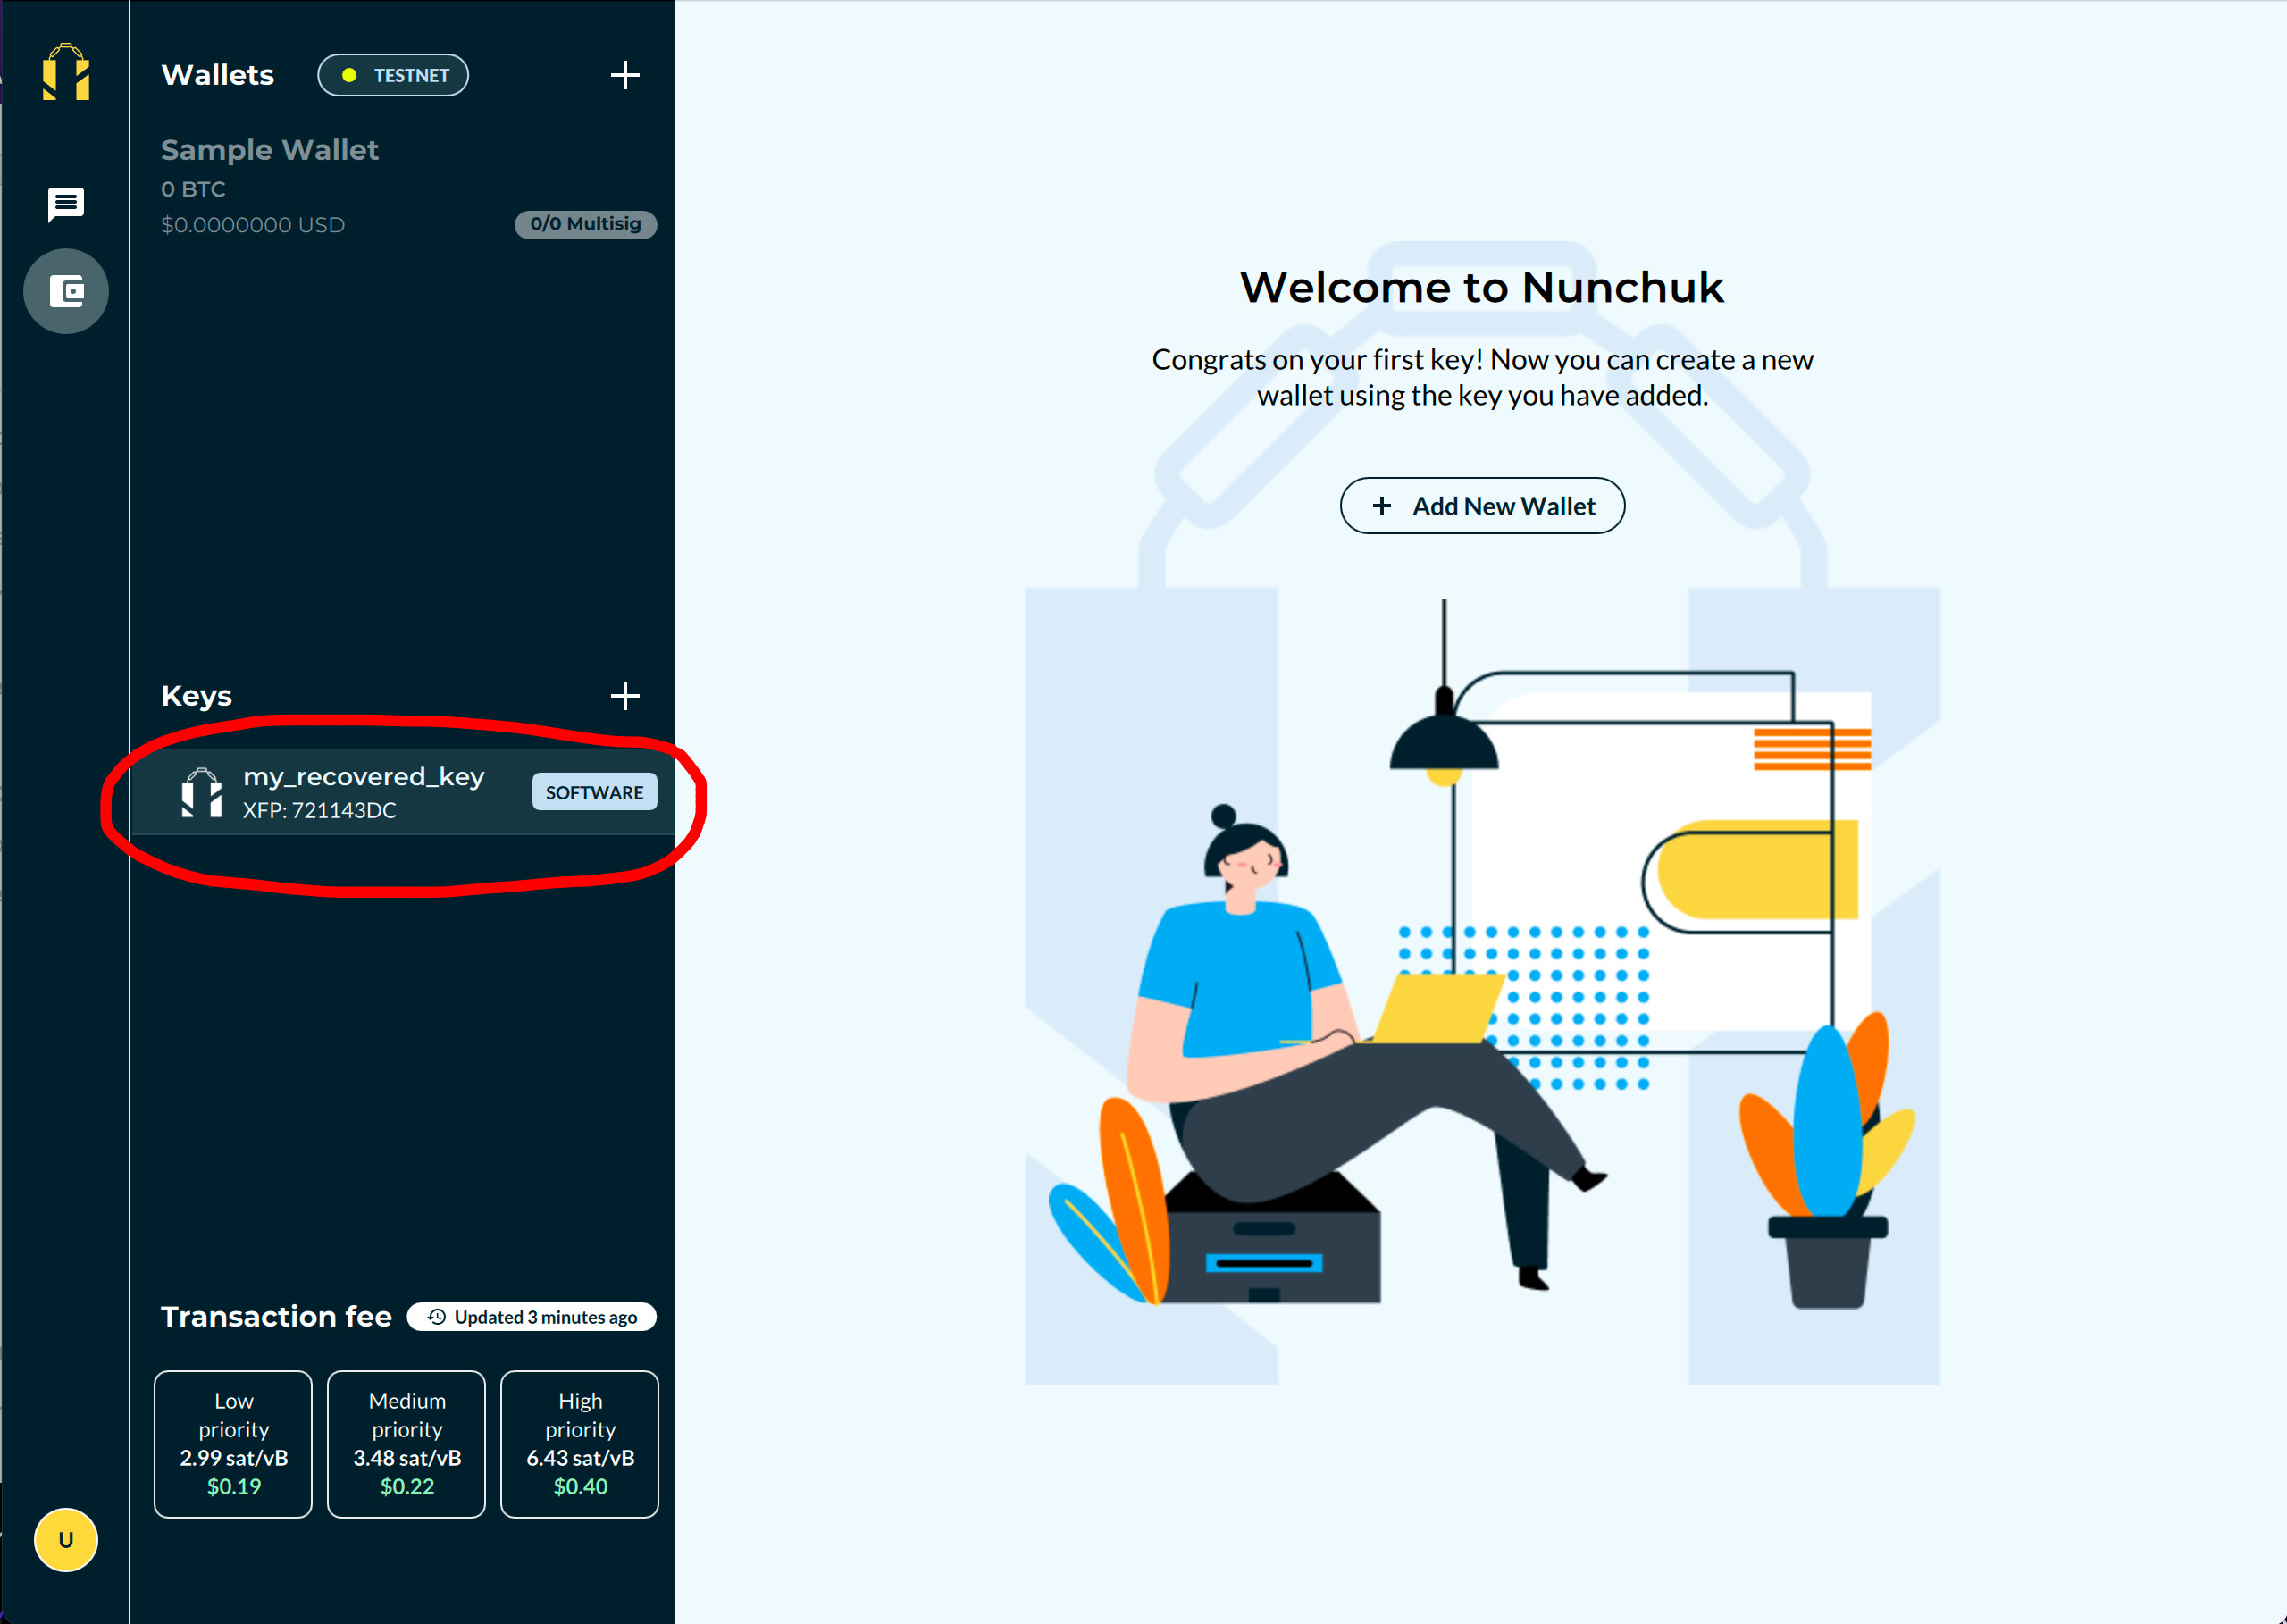
Step 6: Clean up
To wipe all data used during the recovery process, remove the wallet first, then all of the keys.