Creating a multi-signature (multisig) wallet
You should have at least two keys in your account. If you need help creating keys click here.
- Click the + symbol next to “Wallets” to add a key.

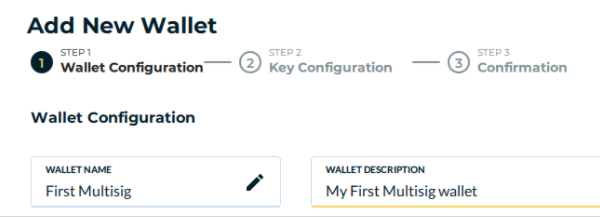
- Name your wallet, give it a description (optional), and then proceed to the next screen.
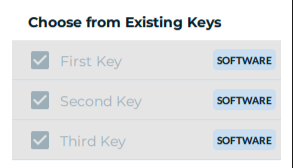
- Click the checkbox of the keys you want to associate with your wallet.
- Assign the keys you selected to the wallet by clicking the “Assign To Wallet” button. You should see the keys listed on the right side now under “Key Configuration.”

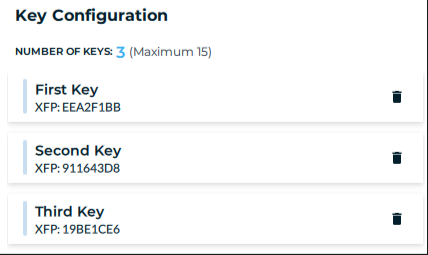
- Specify the number of keys (signatures) required to spend from the wallet. This number must be greater than or equal to one, and less than or equal to the total number of keys in the wallet.

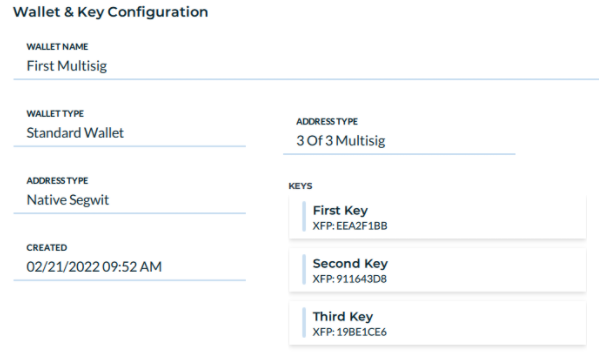
- Proceed to the next screen by clicking “Next: Review Wallet” and confirm the details of the wallet. Finalize your wallet by clicking the “Create Wallet” button.
You will be prompted to back up your wallet by creating a BSMS (Bitcoin Secure Multisig Setup) file. This is highly recommended for a multi-signature wallet. There are 2 options for recovery. You will need either (a) the BSMS file and enough keys to satisfy the number of signatures required or (b) all keys and “guess” what the original BSMS file was. The latter might require specialized tools and can fail for highly-customized wallets. If you do not have a backup or a working wallet, you risk losing access to your funds forever.
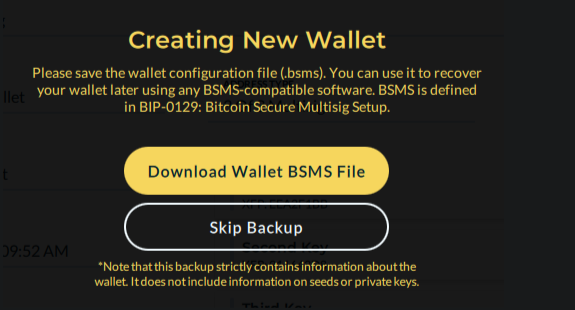
This backup file strictly contains information about the wallet. This means access to this file could be used to track the wallet’s funds but not to spend from the wallet.