Creating a self-managed, multi-device multisig wallet
This tutorial is for someone that would like their transactions to be signed from multiple devices. In this workflow, we will be using a desktop, a laptop, and a mobile phone to create a 2-of-3 multisig wallet. You can also use this workflow as a template to create more complex multisig wallets.
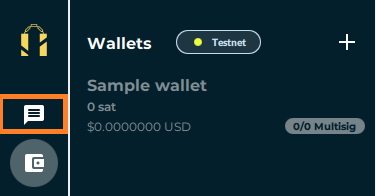
You must be signed in to your account in order to access the messaging system.
You will need to import or create a key for each of the devices you wish to use in the wallet. The keys cannot be the same. If you need help creating keys click here.
 2. Click the "Start new message" button and type in your name or email. You should see your name and email pop up below, click it!
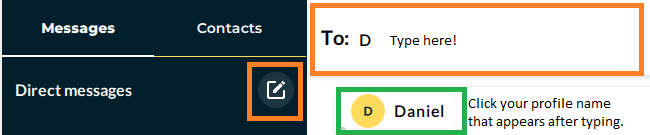
 3. Send a friendly message to yourself to initiate the chat room. After sending the message, you should see a new chat room with yourself!
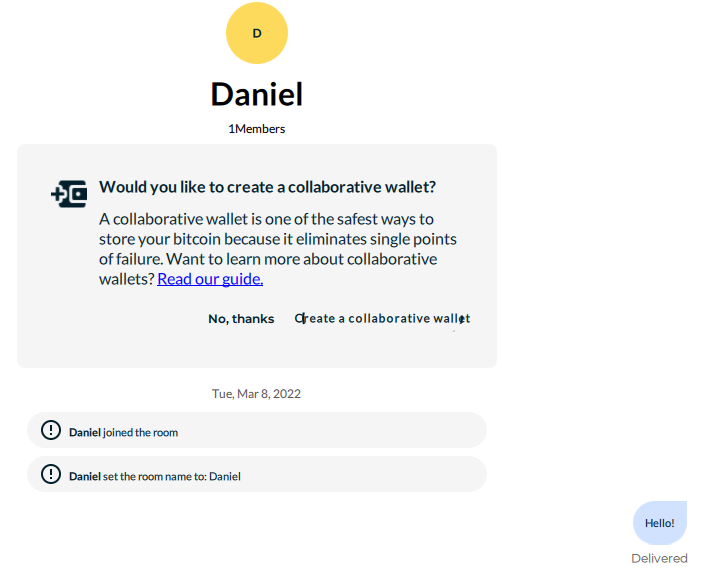 4. Click the "Create a collaborative wallet" button to initiate the wallet creation process.
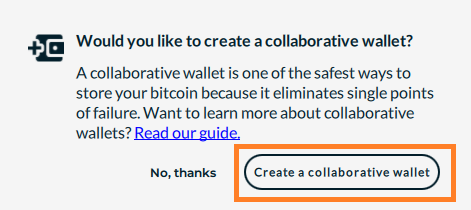 5. Name your wallet and click "Continue".
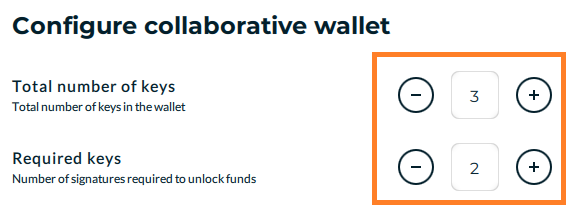
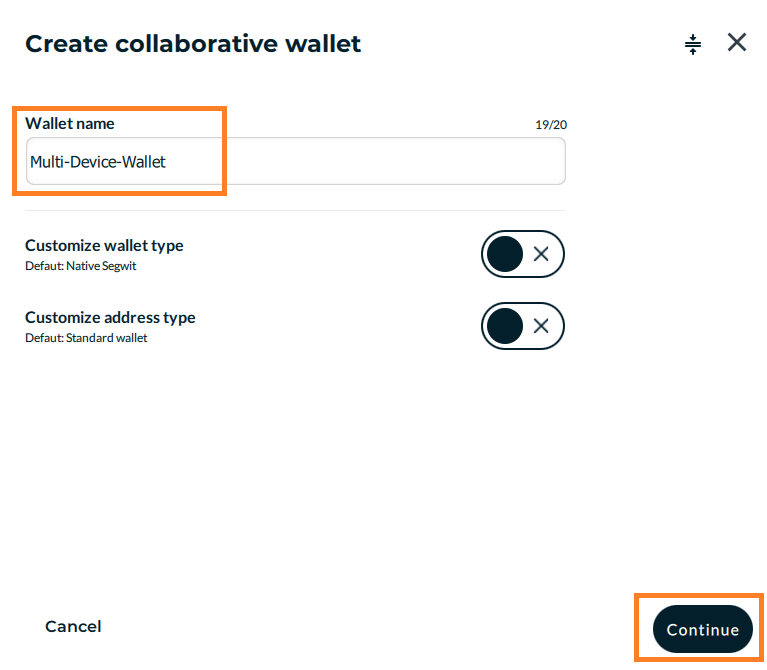 6. Specify the number of keys you will be using in your wallet. Then, specify the number of keys needed to spend from the wallet.
The total number of keys refers to how many keys are involved in the wallet. The required keys refer to how many keys are needed to sign off on each transaction. The latter number must be smaller than or equal to the former.
 7. Double check the key configuration before clicking "Continue".
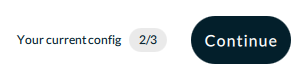 8. Review the other parameters of your wallet, then continue.
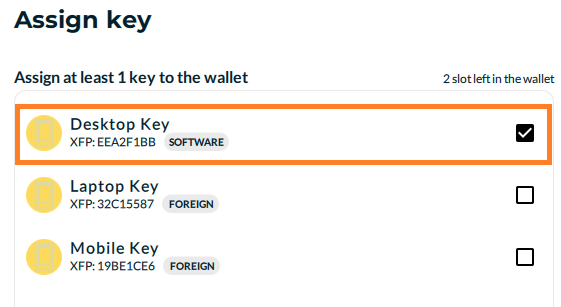
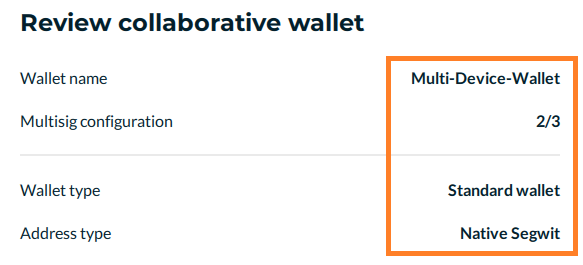 9. Ensure your local key is selected (in the screenshot below, the Desktop Key is the local key) and click "Continue".
The key in green (Software) is eligible for signing locally on your current device. Foreign keys are not eligible for signing locally. Signing using foreign keys must happen on the device they were created on (or imported into).
 Alternatively, you can assign all keys to the wallet at once.
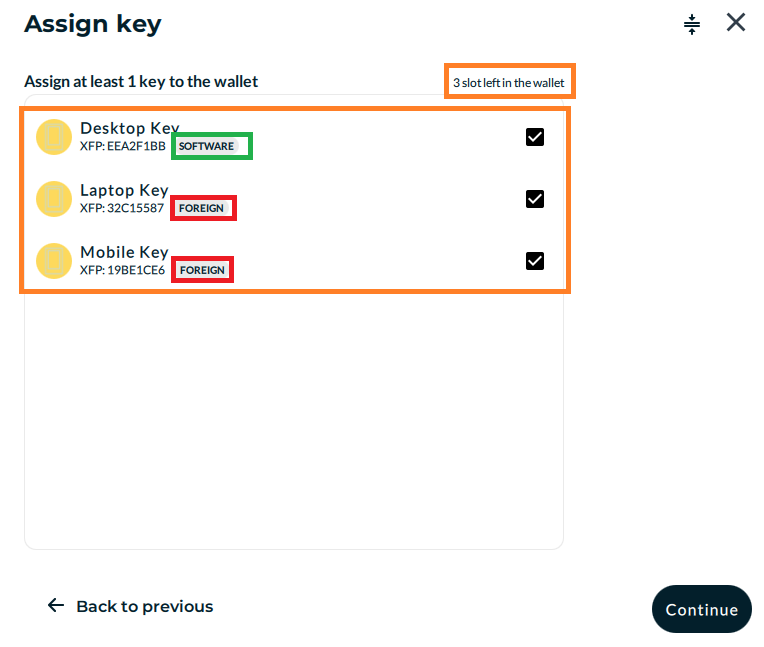
As illustrated above, there are two ways to assign keys to a wallet in a chat. You could assign them from a single device, provided that all of your keys have been synced to that device. Or you could assign keys one-by-one from the respective devices that the keys were created on. If you choose to do the latter, continue onto the next tabs.
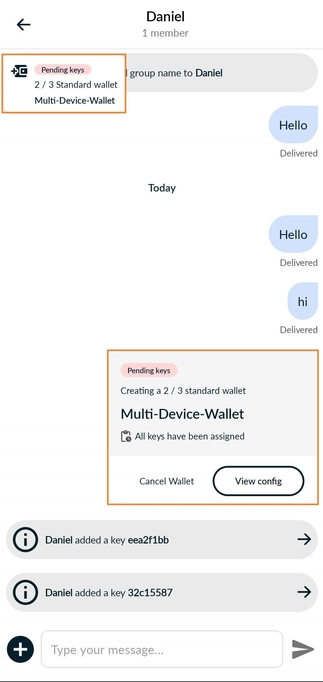
If you did not have all of your keys available on your desktop when assigning keys to the wallet, you can continue the assignment from another device. It is assumed that you have started to create a wallet and can see a pending Wallet Creation notification in the chat screen of your laptop. If you do not, you should go back to the previous tab and create a wallet first.
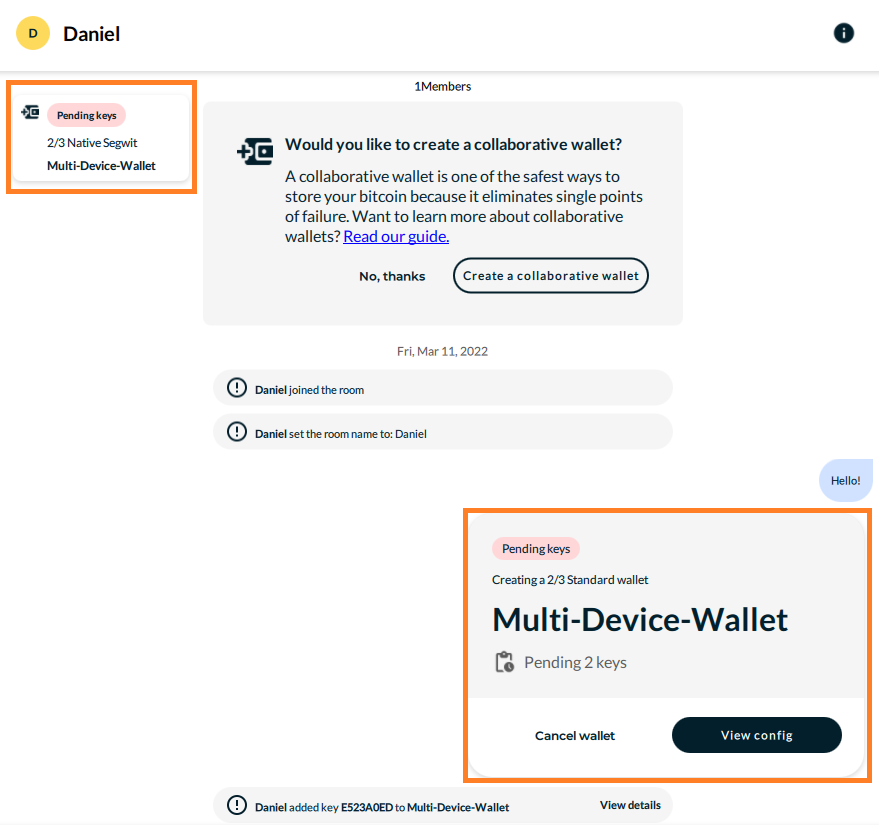
2. Navigate to the chat screen. There you should see the pending Wallet Creation notification. Click the "View config" button.
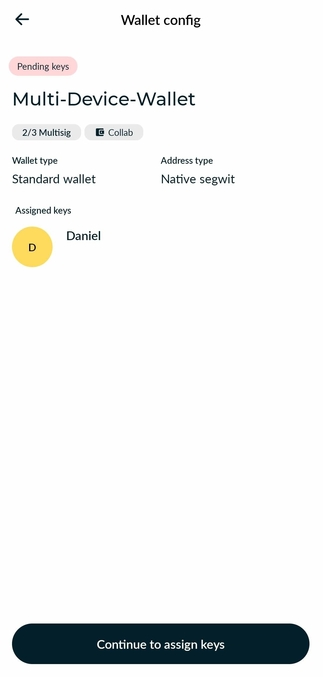
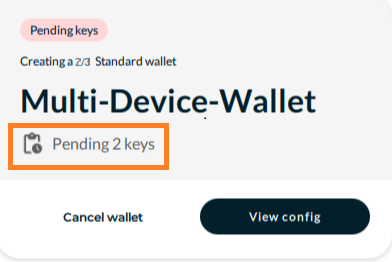 3. Here you can see the wallet configuration as well as the keys that have been assigned to the wallet. Click the "Continue to assign keys" button.
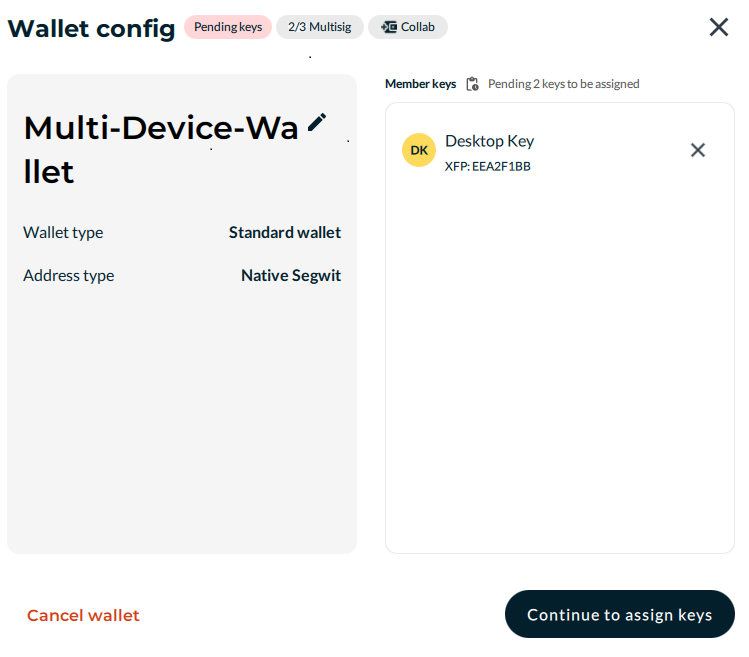 4. You can now assign the key stored locally on your laptop. Notice that the other two keys are considered foreign and your local key is recognized as a "SOFTWARE" key.
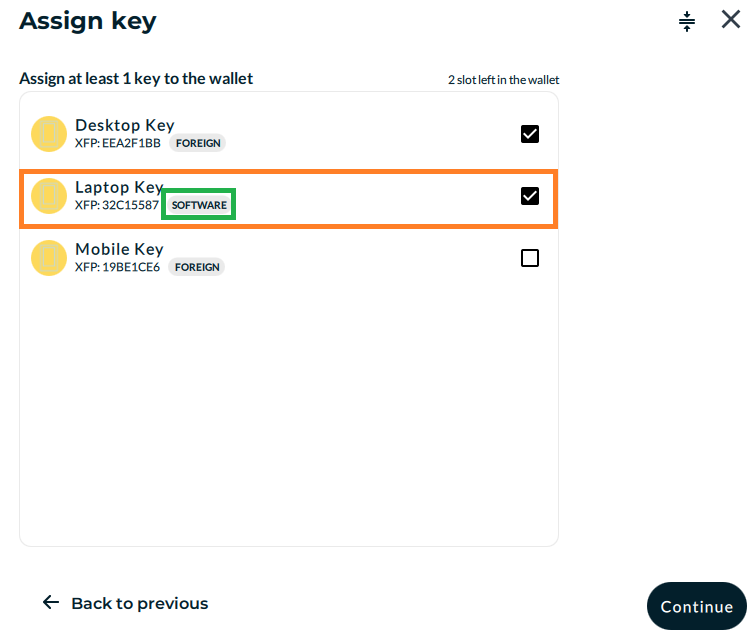 5. You should now be returned to the chat screen and see that your wallet is now only pending 1 key.
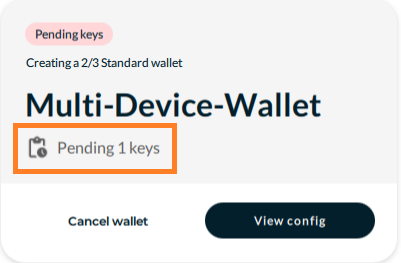 6. Continue to your next device!
If you did not have all of your keys available on your desktop when assigning keys to wallet, you can continue the assignment from another device. It is assumed that you have started to create a wallet and can see a pending Wallet Creation notification in the chat screen of your mobile device. If you do not, you should go back to the desktop tab and create a wallet first.
 2. Click on the "View config" button.
3. Click the "Continue to assign keys" button at the bottom of the screen.
 4. You can now assign the last key to the wallet (in the screenshot below, it is the Mobile Key).
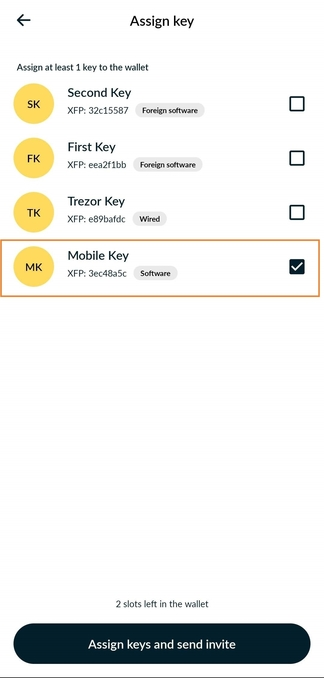 5. You should now be returned to the chat screen and see that the wallet status has changed to "Pending finalization". On any of your devices you can open the wallet config again by clicking the "View Config" and then the "Finalize wallet" button!
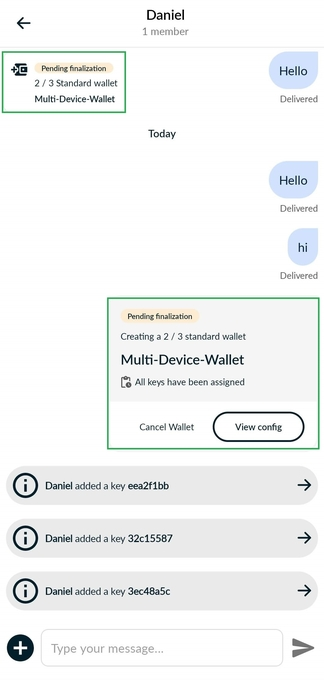 6. Review the wallet configuration one more time, make sure everything is correct, then click the "Finalize wallet" button.
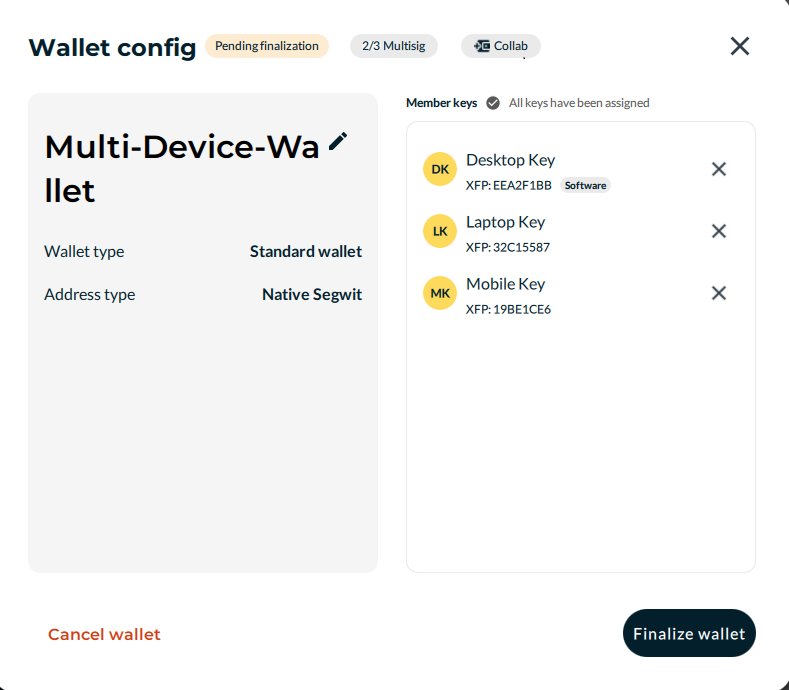 7. You're all done! You should see your wallet on the main screen.
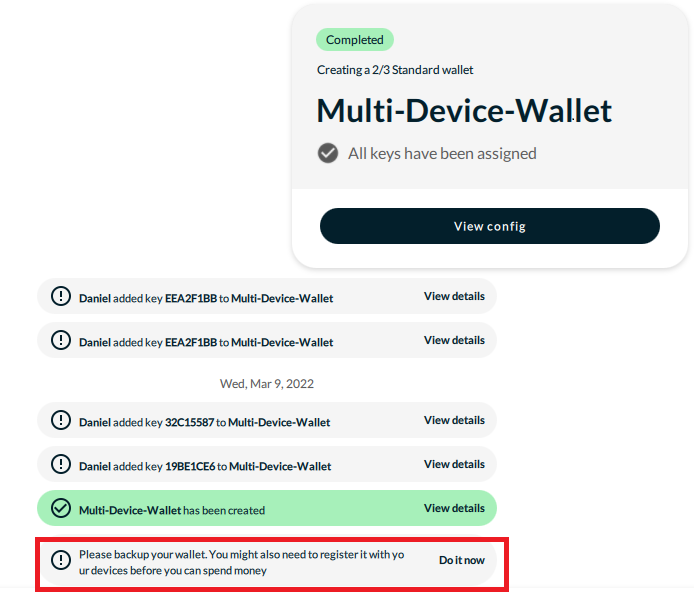
Typically for collaborative wallets, the rule is that the creator of the wallet must be the one finalizing it. However, for self-managed multisig, the wallet can be finalized from any device (since it’s the same user). Once you have assigned all keys to your wallet, you will see a “Finalize wallet” button in the chat screen. You can click that on any device and finalize the wallet! Be sure to follow the instructions to create a backup!
It is highly recommended to back up your wallet (highligted in red below). There are 2 options for recovery. Either (a) the BSMS file AND enough keys to satisfy the number of signatures requirement or (b) all keys and brute-forcing to “guess” what the original BSMS file was (this can fail with highly-customized and more advanced wallet configurations).If you do not have a backup or a working wallet, you risk losing access to your funds forever.